A trigger is a great feature for automating certain tasks. This saves you time and gives you an even better experience with Leadinfo. The trigger menu might look complicated, but we're happy to help you out!
Below, we have made a list of the 5 most used triggers by our customers.
- Trigger on Google Ads
- Visit a specific page
- Trigger on a specific branch
- Filter leads by ZIP and assign them to colleagues
- Trigger based on one or multiple region(s)
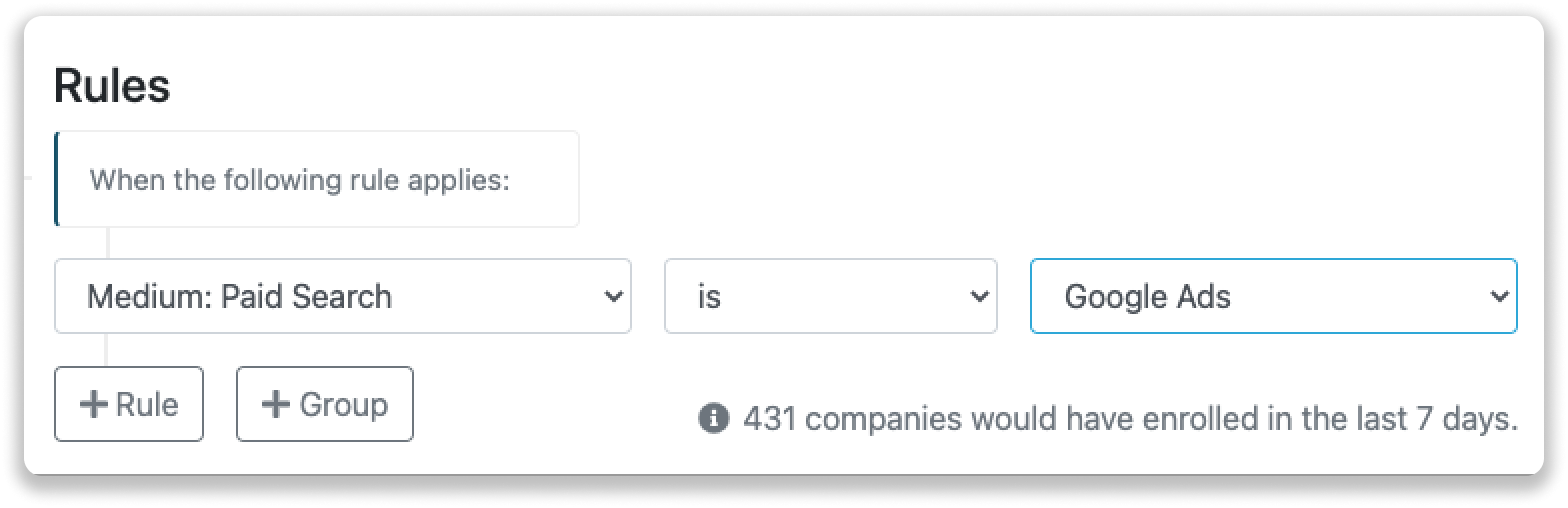
1. Trigger on Google Ads
You can use triggers to easily identify if a website visitor came to your website through Google Ads. Follow the steps below to set this up.
Step 1: Navigate to "triggers" in the Leadinfo portal and create a new trigger.
Step 2: Below the rules, select the rule "Medium: Paid Search" and from the dropdown select "Google Ads".
Step 3: Determine the action you'd like to execute when someone meets the trigger.
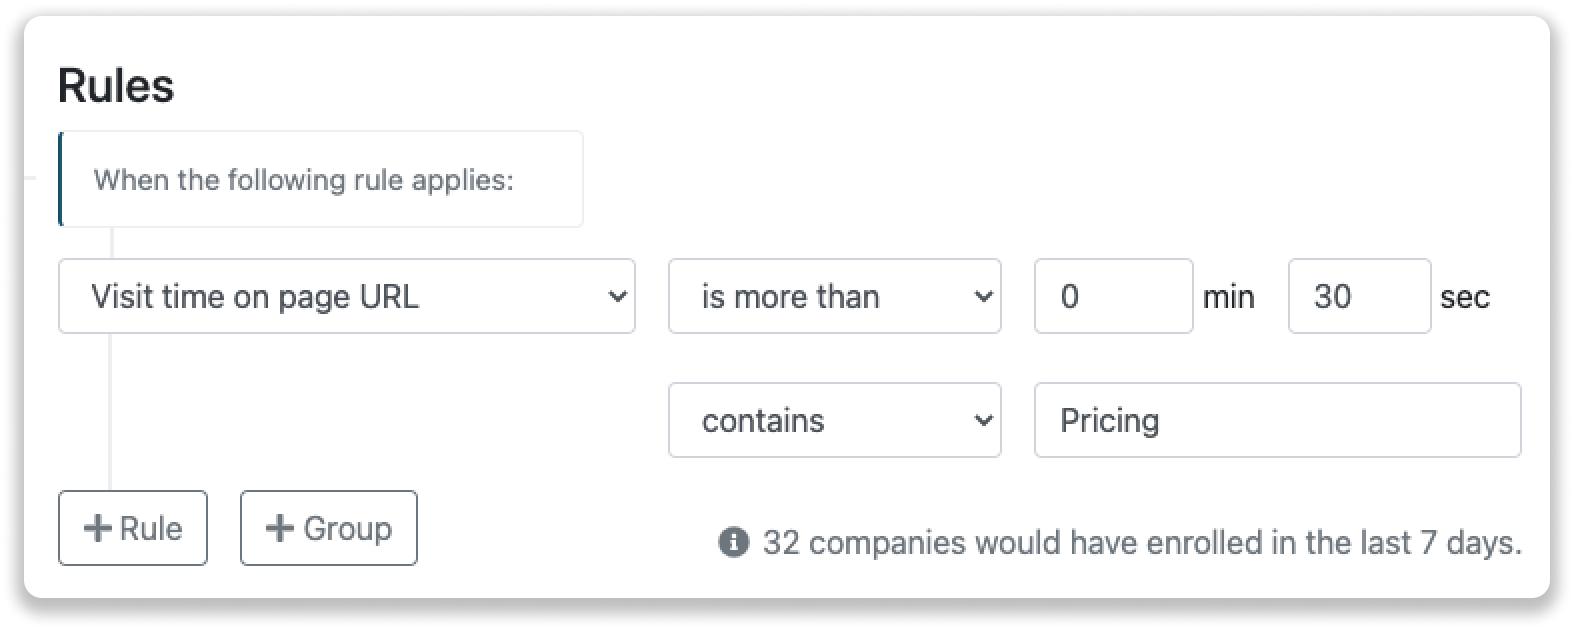
2. Visit a specific page
Automatically assign tags to companies that visited specific pages of your website. Allowing you to spot the hot leads from the cold ones. There are two different options to create a trigger based on URL.
- Page URL: Checks if the company visited a page, regardless of how long they spend on that page.
- Visit time on page URL: Check if the company visited a page and spend at least a specific amount of time on that page.
Let's create a trigger that assigns the tag "Hot" when a company visits the pricing page for at least 30 seconds.
Step 1: Go to “Trigger” in the Leadinfo portal and create a new trigger.
Step 2: Below the rules, select the rule "Visit time on page URL". Fill out a unique part of the URL, for example pricing, and select the amount of time.
Step 3: Below Action, select "Tag" and add the tag "Hot" below Tag to add.
Step 4: Enable your action and set your trigger live.
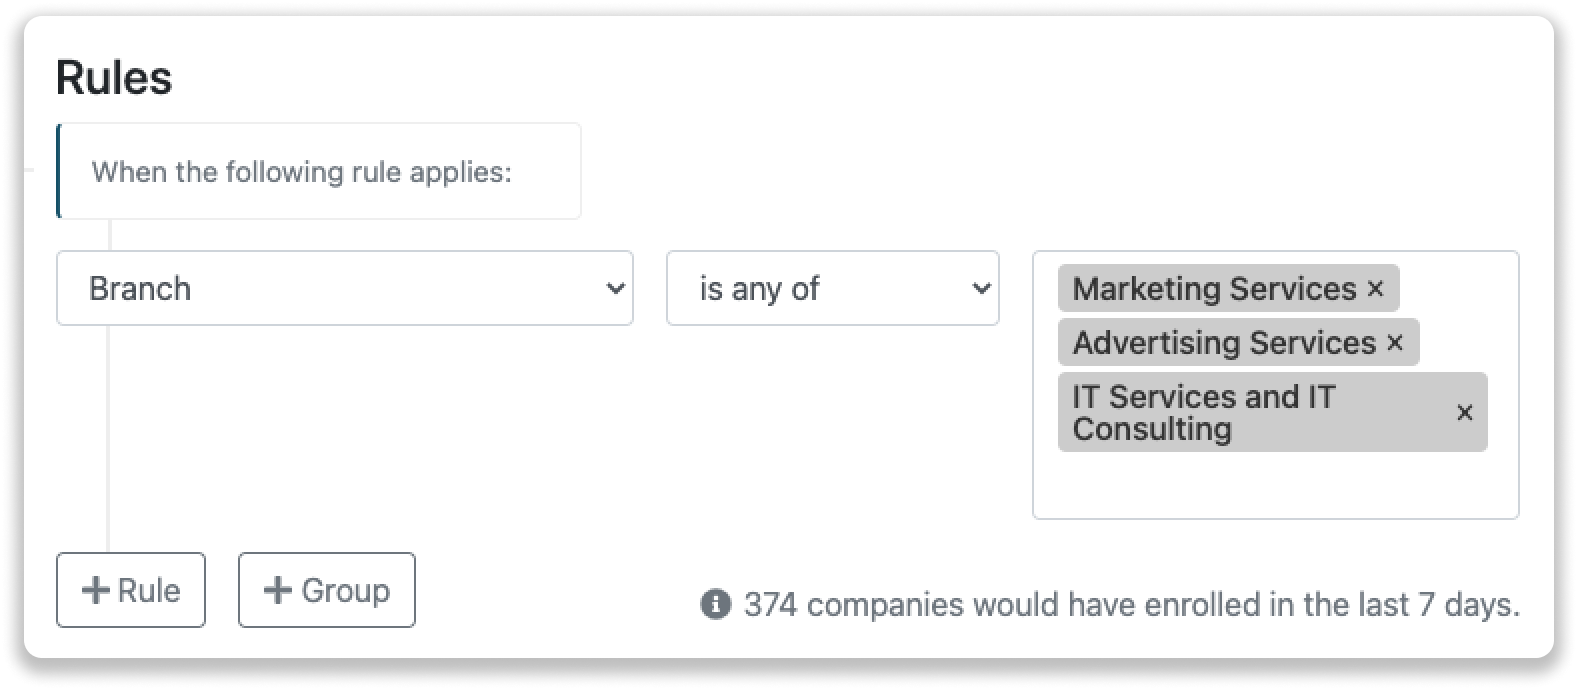
3. Trigger on a specific branch
Not every company that visits your website is an interesting company for you to follow up on. Many companies focus on companies from specific branches. Leadinfo allows you to automatically assign tags to companies or automatically send companies to your CRM based on the branch that they're active in.
There are 5 branch options to use in the trigger. In this example, we'll focus on the rule "Branch". This rule specifically looks at the branch the company provided in the LinkedIn company profile. This article explains how to use the other 4 options.
Step 1: Go to “Trigger” in the Leadinfo portal and create a new trigger.
Step 2: Below the rules, select the rule "Branche" and select the branches you focus on.
Step 3: Below Action, select "Tag" and add the tag "Hot" below "Tag to add".
Step 4: Enable your action and set your trigger live.
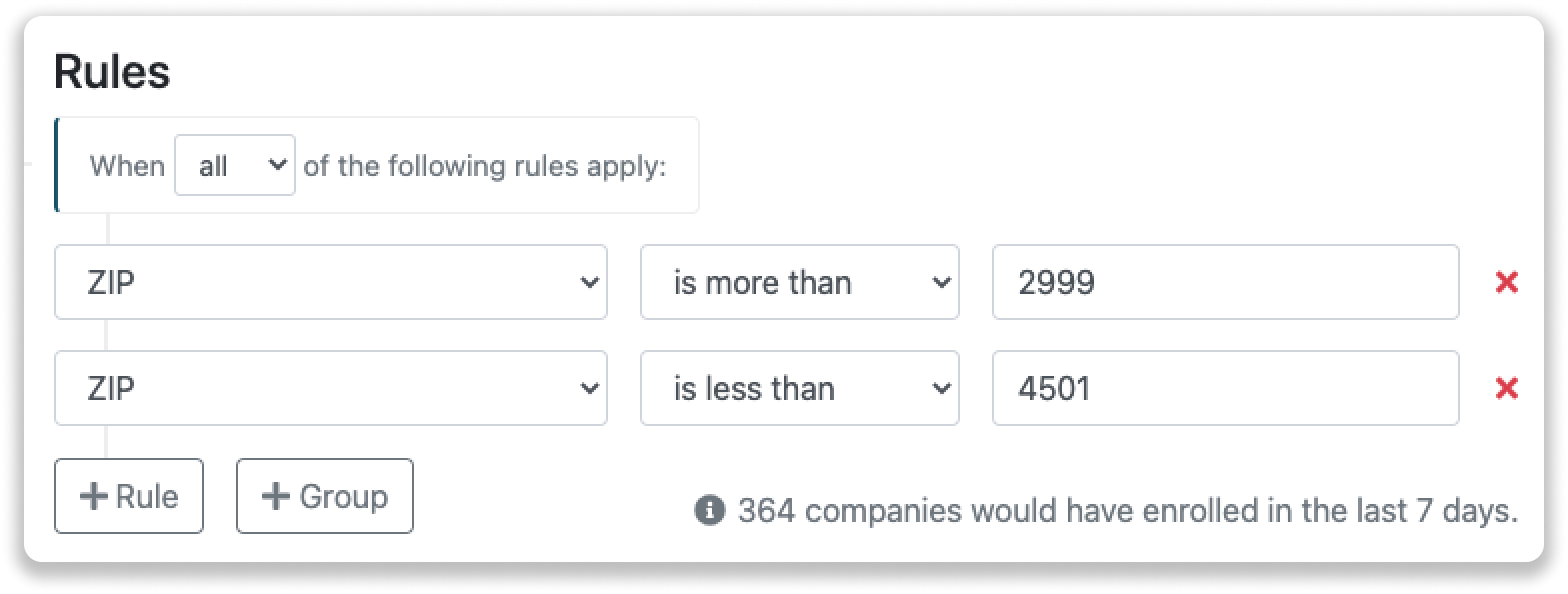
4. Filter leads by ZIP and assign them to colleagues
With bigger sales teams, leads need to be divided to share the workload. You can do this based on size, and industry but also based on region. One of the most used triggers is to divide leads based on the ZIP code. Use Leadinfo to easily divide the workload by region.
When you use the rule ZIP code, we recommend using the "Is more than" and "Is less than" conditions. These conditions allow you to trigger specific ZIP code areas. In the example below we'll create a trigger for a sales rep who's responsible for an area that has ZIP codes from 3000 until 4500.
Step 1: Go to “Trigger” in the Leadinfo portal and create a new trigger.
Step 2: Below the rules, select the rule "ZIP" and choose the condition "Is more than". Fill out 2999, because you want to trigger the ZIP codes starting from 3000.
Step 3: Create another rule by clicking "+Rule" and select the condition "is less than". Fill out 4501, because you want to trigger the ZIP codes until 4500.
Step 4: Set up an action and set your trigger live.
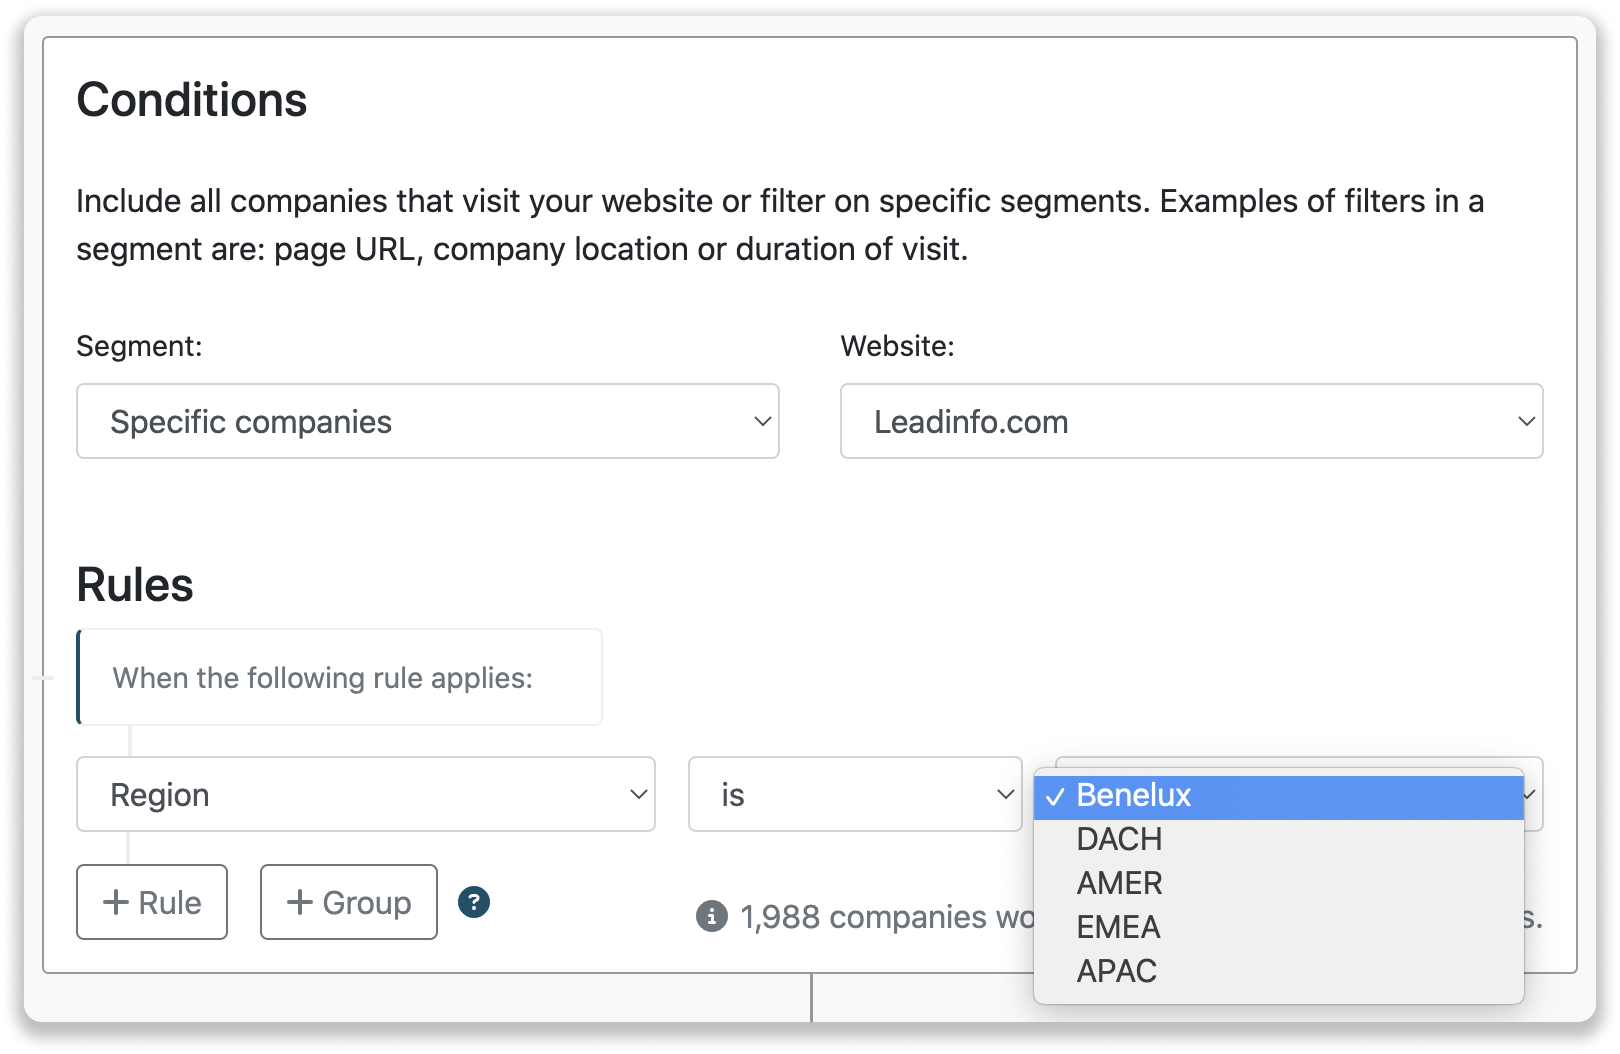
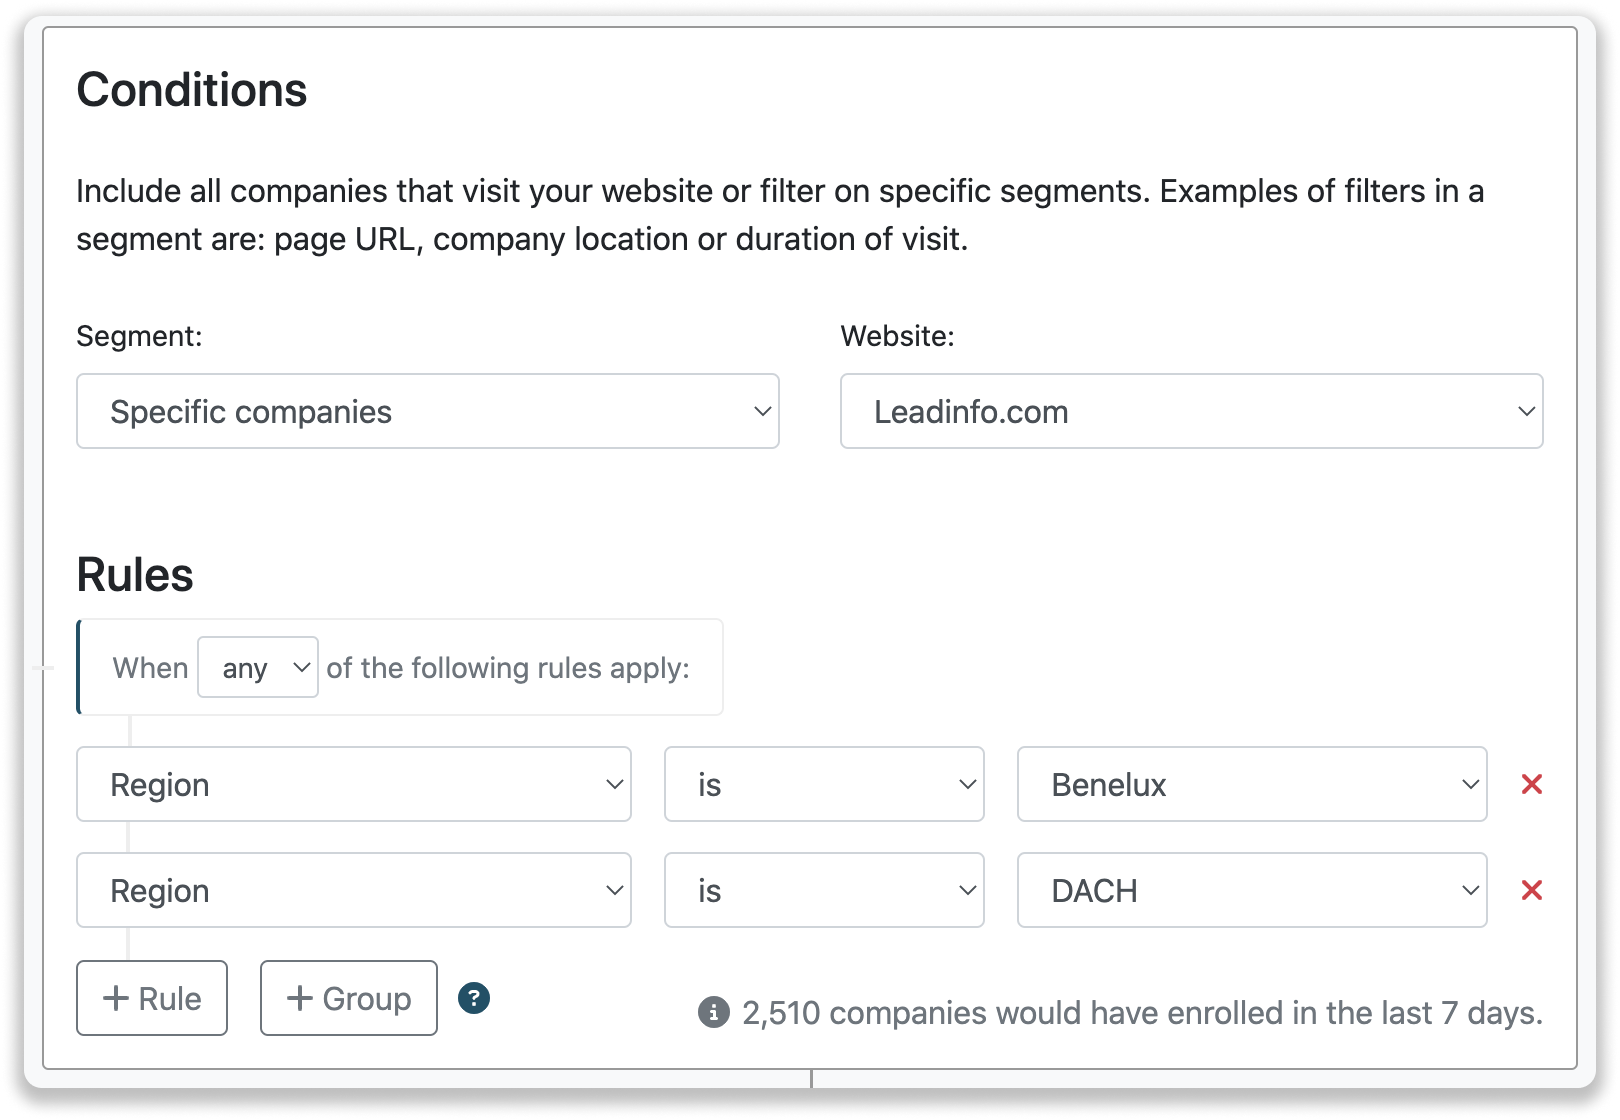
5. Trigger based on a region
Step 1: In the Leadinfo portal navigate to "Triggers", and create a new trigger.
Step 2: Determine the region that you want to base your trigger on.
Step 3: Determine what action you'd like to execute. Among others, you can assign a tag or get notified via e-mail.
You want the company to be from one of multiple regions? Add another region and change the setting from "When all of the following rules apply" to "When any of the following rules apply"
These are the top 5 most used triggers that can help you achieve even more results with Leadinfo. Of course, you can also implement your own ideas into the triggers.
Do you have any questions about triggers? Feel free to read our other articles about triggers, or ask us a question via the chat in the portal!