If you do not want to track every page on your website, you can install the tracking code on specific pages. For example, on the pages that you are only using for online lead generation campaigns.
There are two ways to do this:
Installing the code on specific pages manually
If you have access to the source code of your website, you can manually add the tracking code to specific pages. Make sure that you place the tracker behind the <head> tag. However, we recommend using Google Tag Manager. If Google Tag Manager is already installed on your website, you do not need access to the source code.
Installing the tracking code on specific pages via Google Tag Manager
Step 1: Copy the tracking code
Copy the tracking from the portal. You can find your code in the portal under "Settings".
-png.png?width=576&name=Group%2091%20(1)-png.png)
Step 2: Create a new trigger in Google Tag Manager
Go to your Google Tag Manager account and select "Triggers" on the left side. Give your trigger a name and click on the circles. Here you need to select "Page View".
In the settings of the trigger, select "Some Page Views" and click on "Page URL" in the dropdown menu. Provide a unique part of the URL where the tracking code needs to be active. For example, if you only want to track the pages that have the term "business" in the URL, you need to set the settings as "Page URL contains business". Click on "Save" in the top right corner.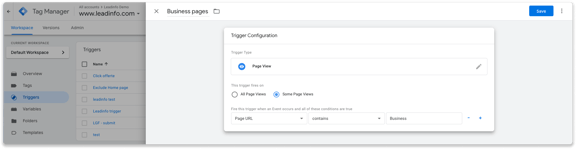
Note 📝: If you wish to track on multiple different pages, you have create multiple triggers as explained above.
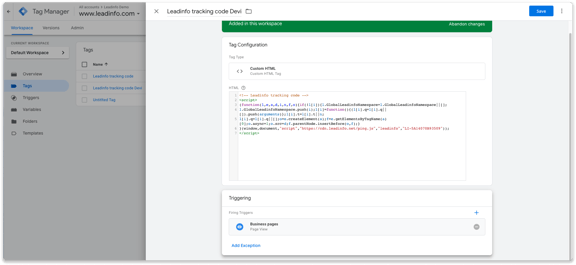
Step 3: Create a tag in Google Tag Manager
Now, you can add the tracking code to Google Tag Manager. Click in the left menu on "Tags" and create a new tag by clicking on "New" in the top right corner. Give your tag a unique name, for example, Leadinfo Tag and click on the two circles.
From the list, you need to pick the tag: "Custom HTML". Here, you need to paste the code you've copied from step 1.
-png.png?width=576&name=Schermafbeelding%202021-12-29%20om%2016-22%201%20(1)-png.png)
Step 4: Add the trigger you have created in step 2
Your tag will only be fired when it's connected to a trigger. Click on "Triggering" and select the trigger that you created in step 2. Make sure to save the tag by clicking "Save" in the top right corner.
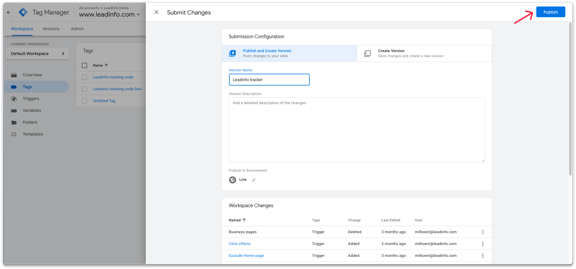
Step 5: Publish the latest version
You're almost ready to start recognizing companies on your website. The final step is to publish the newest version of the container. Click on "Submit" in the top right corner, give your version a name and click on "Publish".