Manage your Autopilot Seats
Buy, (re)assign and manage your seats for Leadinfo Autopilot
To begin using Autopilot, you must have an Autopilot Seat assigned to your user account within Leadinfo. This enables you to link your LinkedIn or email account to Leadinfo. You have the option to add multiple seats to a single account, allowing multiple users to connect their accounts seamlessly.
In this article we'll show you how to add, assign and manage seats within your account!
Good to know: The cost of an Autopilot seat depends on your subscription package. You can add seats to your subscription settings or by reaching out to our team on support@leadinfo.com.
How to purchase Autopilot seats
If you have completed your trial and wish to include it in your subscription, navigate to your Subscription Settings. Then, choose "Add / Seat / Month" to specify the number of seats you want to add to your account.
After purchasing the seats, the next step is to assign them to a specific user. To do this, go to "Users" > "Seats" in your account overview. From there, you can allocate your available seats to your colleagues seamlessly. More info about managing the seats can be found below.
How to Manage Autopilot seats
Managing Autopilot seats is simple and efficient. When you have an active Autopilot subscription, you can assign the remaining seats available. During a trial period, you have the flexibility to assign an unlimited number of seats for testing purposes.
Manage users in an active Autopilot subscription
Within Leadinfo settings, head to “Users” and select “Seats”.

Here you'll find an overview of all your purchased seats and how many seats you have left to assign.
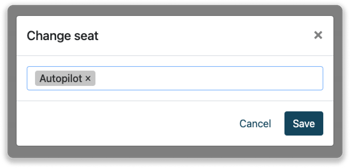
To assign a seat to a user, hover over the user and select “Change Seat”.

From the dropdown, Select “Autopilot” and click on “Save”.

That's it, you have now assigned a seat to a user.
To remove a seat from a user, you can follow the same steps, but simply remove the selected seat.
Manage users during an Autopilot Trial
When you're in an active Autopilot Trial, you can add an unlimited amount of seats to users. In the overview.
Within Leadinfo Settings, head to “Users” and select “Seats”.

Here you'll see that you have an unlimited amount of seats to assign. To assign a seat to a user, hover over the user and select “Change Seat”.
From the dropdown, Select “Autopilot” and click on “Save”.

That's it, you have now assigned a seat to a user.
To remove a seat from a user, you can follow the same steps, but simply remove the selected seat.
Please note: If you choose to include the Add-on in your subscription, we will automatically determine the number of active seats to be included in your subscription. If you decide to add fewer seats, the campaign for the user without a seat will be deactivated.
How to remove seats from your subscription
If you need to make changes to your Autopilot subscription, you can do so from your Subscription settings. If you only want to remove specific seats while keeping Autopilot, you can manage this in your User settings.
To remove seats from your subscription, first, ensure that you unassign them from the user.
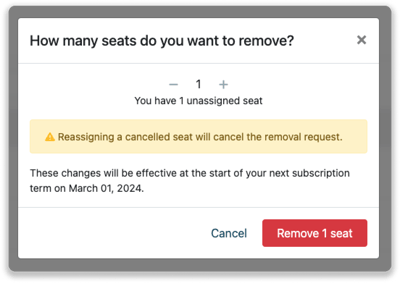
You'll then see how many seats are available to assign. Simply choose "remove unassigned" to proceed with removing the seats.

In the pop-up window, select the number of seats you wish to remove and then click on "Remove Seat".

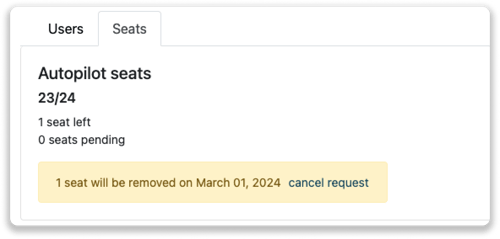
Within the overview, you will be able to view the remaining seats and the number of seats set to be removed at the beginning of your next subscription term.
