Easily install the Leadinfo tracking code on your Typo3 website. You can choose from two different options to install Leadinfo.
We recommend installing Leadinfo through Google Tag Manager if you've already installed this on your website. If you are not using Google Tag Manager, you can install the tracking code via our Typo3 plugin!
Follow the steps below to start recognising the companies that visit your website.
Installing Leadinfo using the Typo3 plugin
We have created an easy-to-install plugin. Simply follow the steps below and start recognising the companies that visit your website.
Step 1: Copy the “Site ID” from the Leadinfo portal. You can find the Site ID in the pop-up on your screen. Or if you've already been using Leadinfo navigate to settings and click on the website under “Websites” to find the tracking code.
![]()
Step 2: Download the plug-in from this website and save it on your computer.
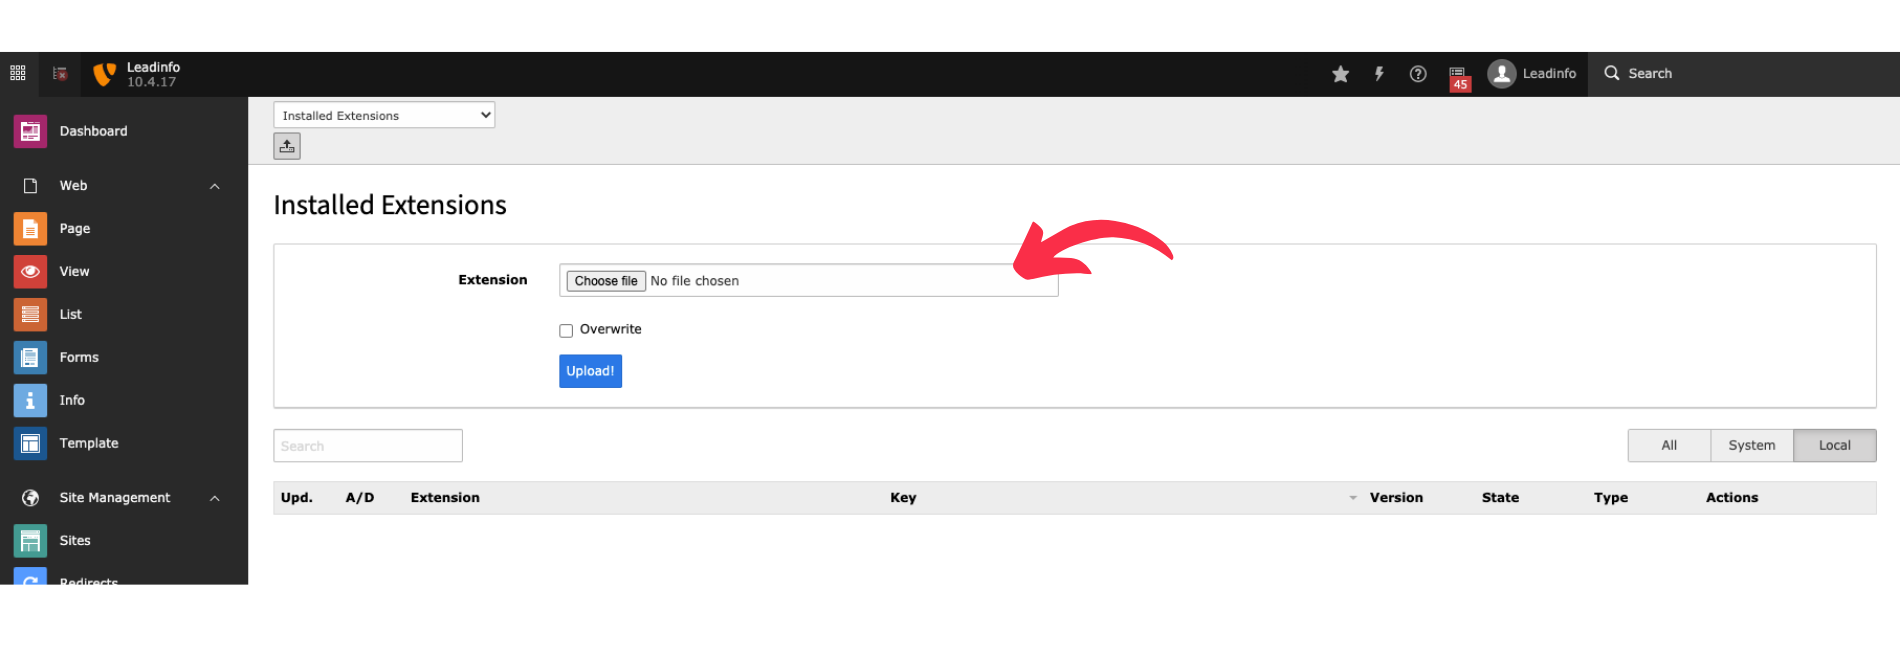
Step 3: Go to Typo3 and navigate to “Extensions” in the menu on the left side. Here you will see an overview of all the extensions you've already installed. Click on the upload button in the top left corner.

Step 4: Select the plugin you've downloaded in step 2, and click on "Upload".
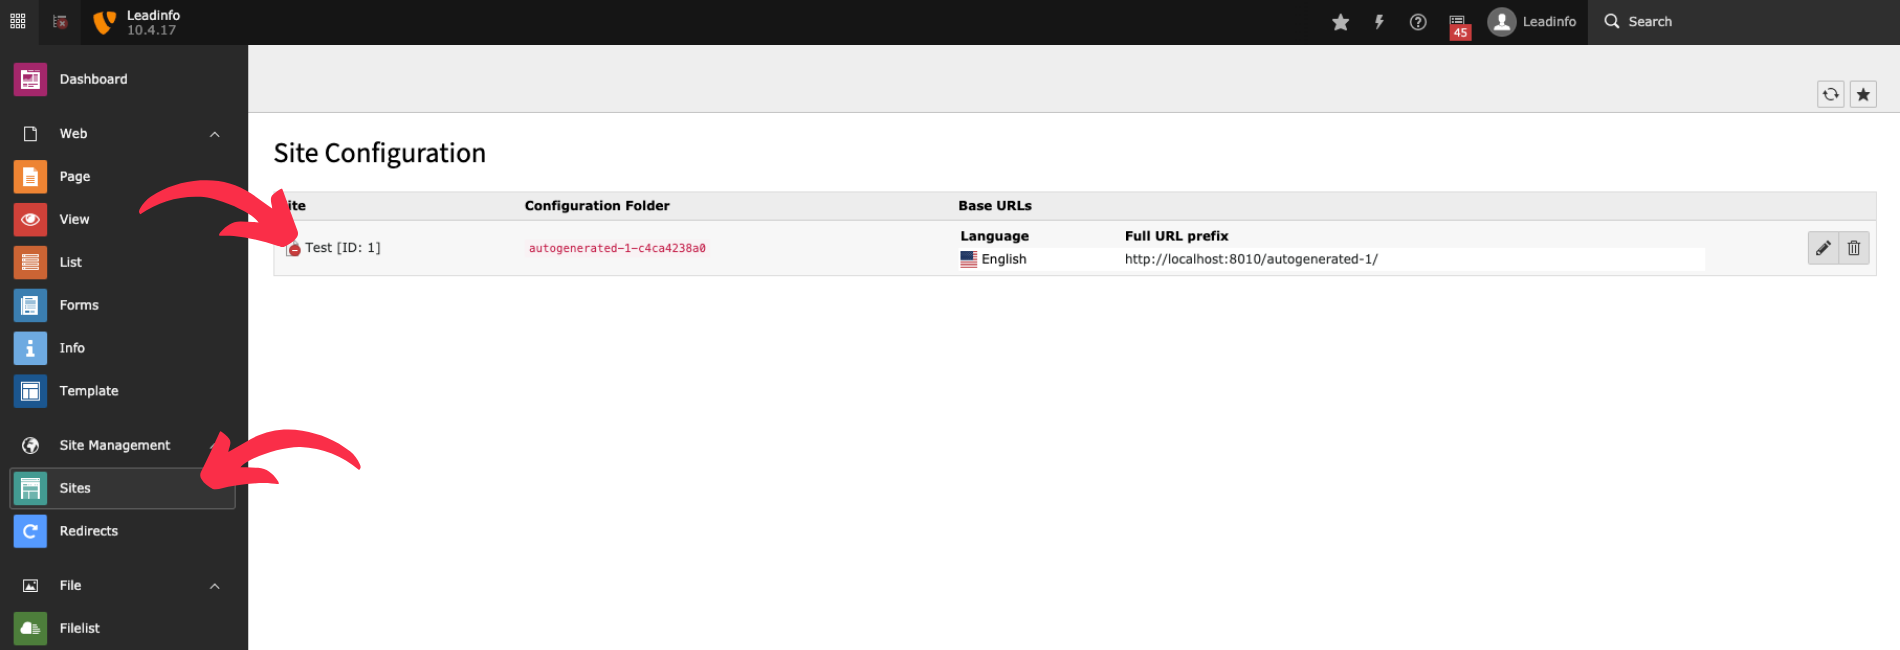
Step 5: Go to the Site configuration to add your unique Site ID. Navigate to "Sites" in the menu on the left side and select the website you want to edit.
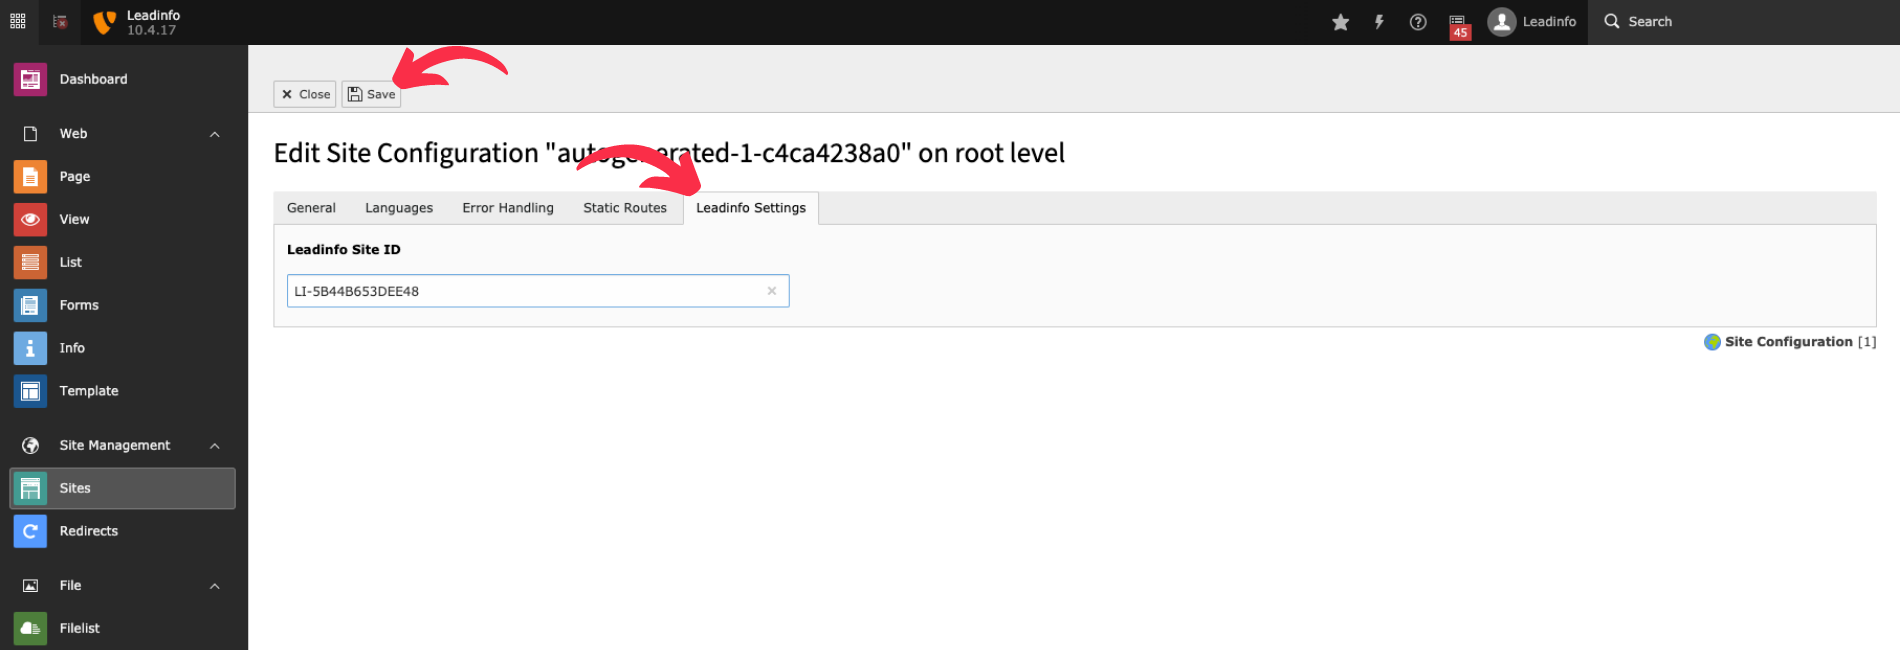
Step 6: Add the unique Site-ID under "Leadinfo Settings". Do not forget to press “Save” in the top left corner.
The tracking code is immediately live on your website. Allowing you to start recognising the companies that visited your website!
As a new Leadinfo user, you will gain access to the rest of the portal when we have registered the first company visit on your website.