You might want to exclude the homepage from tracking because you have a login button on the home page where your customers constantly click on, or because you only want to track companies who click through the website.
Whatever the reason is, we'll help you set this all up. Before we can get started, you need to check if you're using Google Tag Manager on your website. With Google Tag Manager you can easily add, delete and manage your tracking codes on your website. If you're using Google Tag Manager, you can continue reading this help article.
➡️ Check out this Google article if you have not installed Google Tag Manager yet.
How to Exclude Leadinfo from the Home Page using Tag Manager
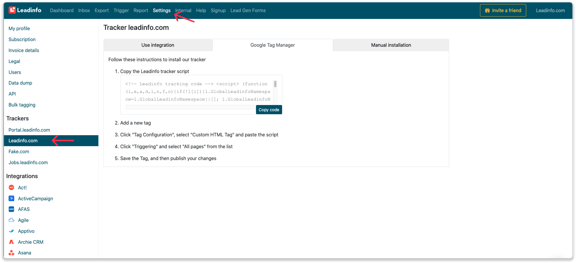
Step 1: Copy the tracking code
Copy the tracking code from the portal. You can find your code in the portal under “Settings”.
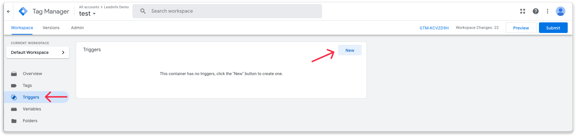
Step 2: Create a trigger in Google Tag Manager
Go to your Google Tag Manager account and select the container that you want to work in. From your workspace, select “Triggers” and click on “New” in the top right corner.
Step 3: Set up the rules for the trigger
First, give your trigger a unique name.
Click on “Trigger Configuration” and select the Trigger Type “Page view”.
-png.png?width=576&name=Group%2096%20(1)-png.png)
Select that the trigger needs to fire on “Some Page Views”. From the drop-down, select “Page Path” “Does not match RegEx" and fill out the below characters:
^\/?(\?(.*))?$
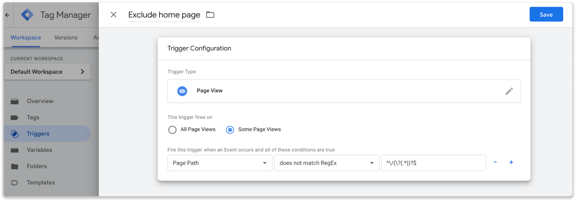
For the users who want to know how it works. The above line in combination with the rule in GTM ensures that trigger only fires if the host name has no page path. Or if the domain name is followed by only a slash, or if a question mark follows a slash.
Step 4: Create a tag and add your trigger
Once you saved the trigger, navigate to “Tags” in the menu on the left side. Create a new tag by clicking on “New” in the top right corner.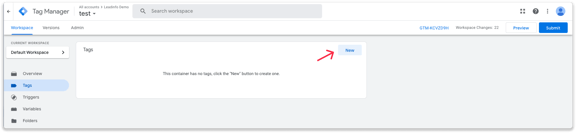
Click on “Tag Configuration” and select “Custom HTML” as Tag Type. In the text box that appears, you can paste the copied code from step 1.
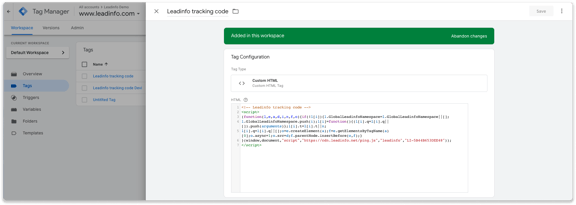
Add your trigger by clicking on “Triggering” and select the trigger you created.
-png.png?width=576&name=Group%2096%20(2)-png.png)
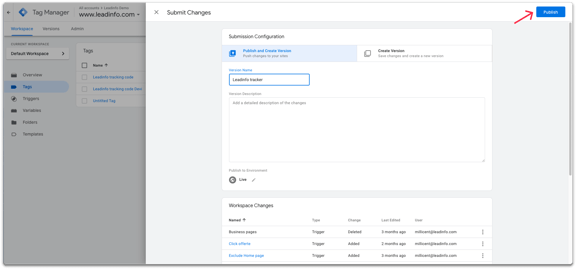
Step 5: Publish your changes
Do not forget to publish the changes you've made. Click on “Submit” in the top right corner, give your new version a unique name, and press “Publish”.
Your changes will be set live, and you can start tracking the companies who visited your website. And of course, your home page will be excluded.