TLimit the access rights of Leadinfo users and help them focus on hot leads only!
You can do this by setting up User Roles and managing their access rights. This article explains in detail how you can manage the rights of the users in your Leadinfo account.
Please note: User roles are only available in the Scale and Pro subscription packages. If the functionality is not included in your current package and you wish to use it, upgrade your account in the Leadinfo portal.
What are User Roles?
Leadinfo offers three different roles for our users. As an Admin user, you can specify the role when you invite people to your Leadinfo account.
- Admin: Has full access to all Leadinfo functionalities and can manage account settings such as Account & Billing, User Management and set up of Integrations.
- Regular: Has full access to Leadinfo functionalities, but cannot manage account settings such as Account & Billing, User Management and set up of Integrations.
- View: Can only view leads.
Good to know 💡: Admins can restrict the access for Regular and View Accounts by only providing access to specific Tags or Tracker, within Leadinfo
What are Access rights?
Access rights allow you to restrict the access of users to a specific domain and/or the tag assigned to the company. This means that one colleague might only have access to companies with the tag “Hot Lead”.
- Website Access: Decide what domain user roles Regular or View need access to. Especially useful when you have different domains from different companies in one account!
- Tag Access: Decide which companies are visible to user roles Regular and/or View. Give access to specific tags assigned to a company. For example, when a user has access to the tag “Hot lead”, companies without this tag will be hidden. Helpful for sales reps who are responsible for different regions.
- Segment Access: Decide which segments different users have access to - this is especially useful if you have sales reps that work with different industries or regions. It allows you to only show the information that is relevant to them.
How can I assign the User Roles & Manage Access rights?
You can easily change the User Roles within the Settings of your Leadinfo account.
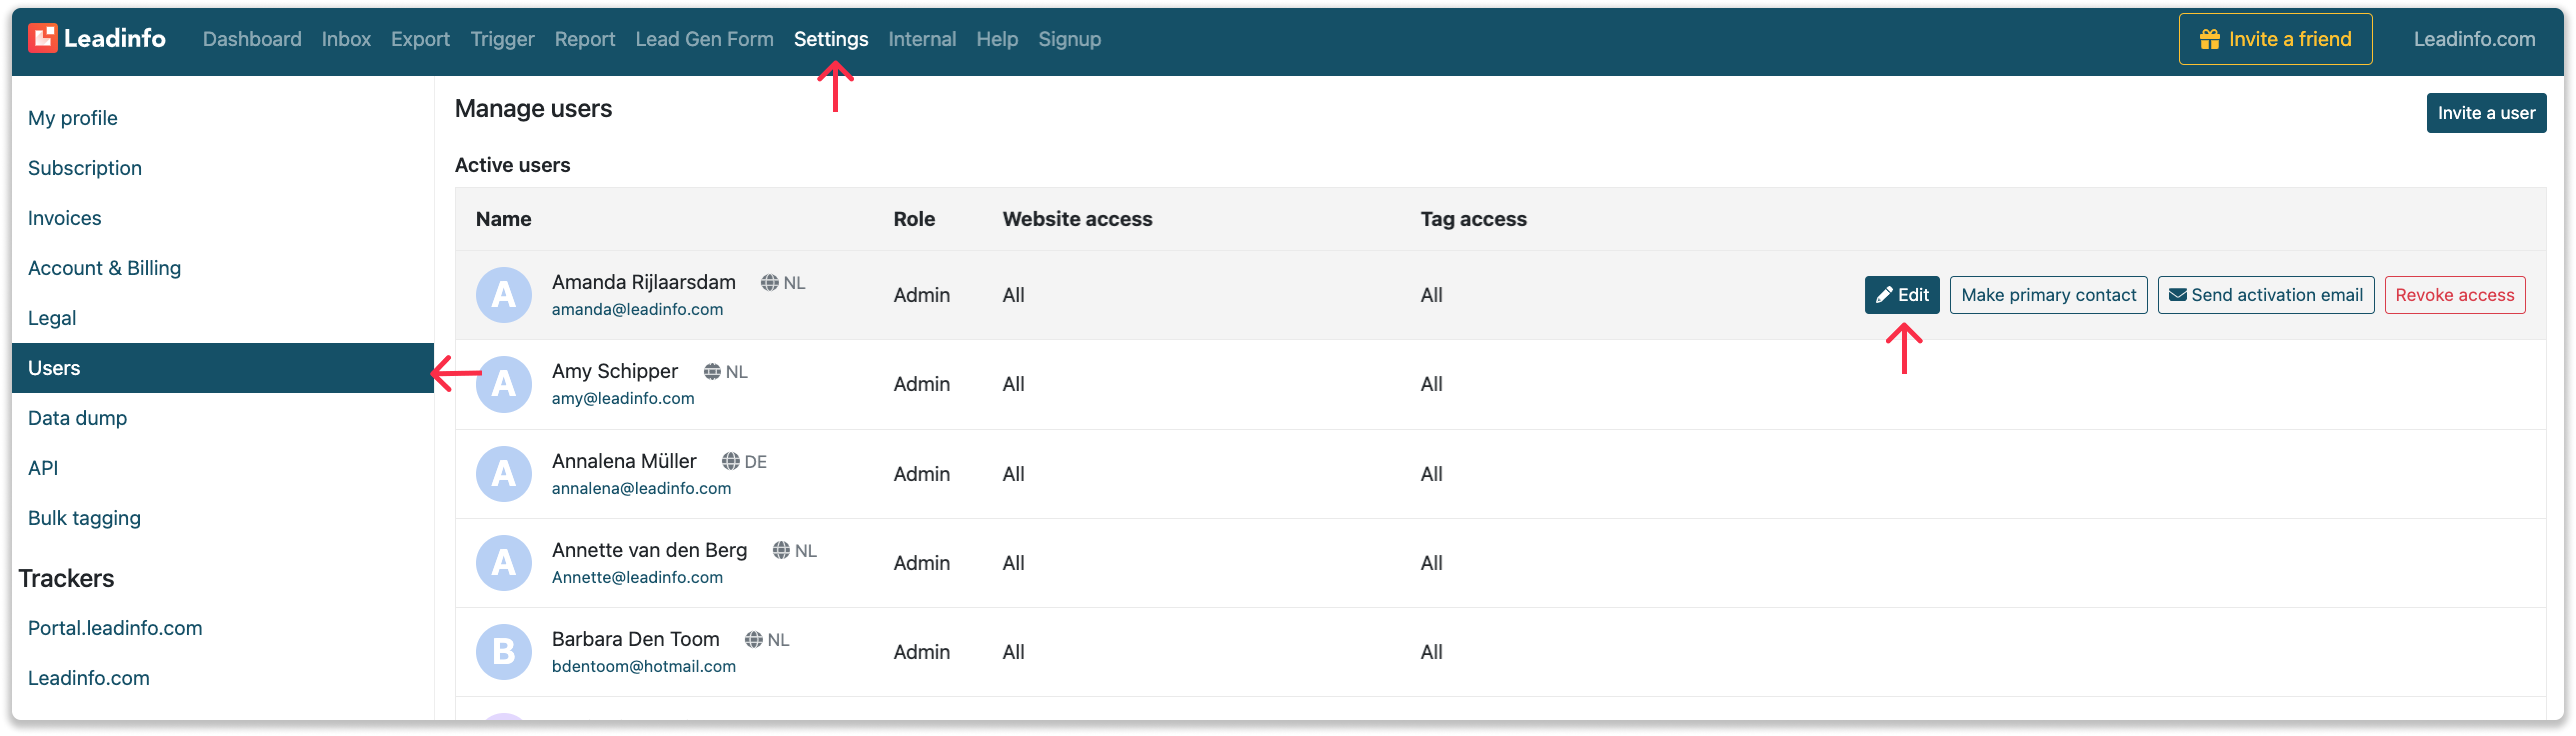
Step 1: Go to "Settings" and select "Users" on the left side.
Step 2: Hover over the user you'd like to manage and select "Edit"
Step 3: Below "Access Rights", determine the role the user needs to have.

If you decide to assign the roles Regular or View, you can manage the access rights of the users. Determine whether your colleagues should have full rights to every company in your inbox or every tracking code in your account. You can also add the department in which the user works.
Step 1: Select the correct role to assign.
Step 2: Below "Specify tracker access", select the domain the users need to be able to view in the Leadinfo account.
Step 3: Below "Specify tag access", or "Specify segment access", select the tags or segments that the companies need to have in order to be shown in the inbox of the user.

Please note: If you do not specify a tag or tracker, the user will have access to everything.
What permissions does each role have?
Account Settings:
Admin
- Manage Subscription, Account & Billing
- Manager User Rights & Access Rights
- Manage Integrations
- All other permissions also possible with regular (please see below)
Regular
- Create & delete tags
- Assign & remove tags
- Send leads to CRM
- Manage & create Leadbots
- Create & manage reports
- Create & manage triggers
- View tags, segments & reports
- Create exports
View
- View tags & segments
- Create exports
Admins can limit the access of user roles Regular & View to specific domains, segments, and tags.