This means that Leadinfo will remember the Google Click ID for up to 90 days after visiting the website! When the website visitor goes to another page or returns to the website within 90 days and makes a request, the Google Click ID will be sent. This way you can measure conversions even better!
Curious about what you can do with a Google Click ID (GCLID)?
Follow the steps below to activate the Google Click ID (GCLID) in Leadinfo:
1. Log in to your Leadinfo account and go to the desired 'Leadbot'.
2. Press the button with the form in which you want to process the GCLID. In our example we use a quote form from Leadbot Premium.

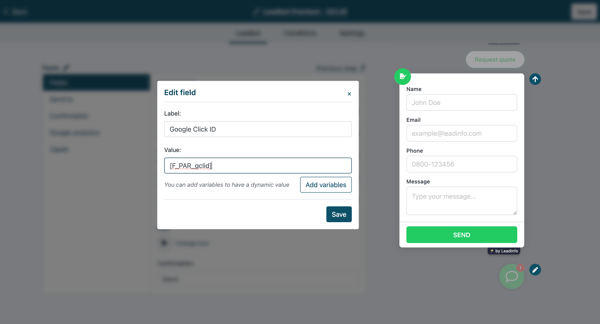
3.Click on the 'Add field' in the quotation form.

4. Select the 'Hidden' field.

5. Enter the following information in the hidden field: Label - Google Click ID or GCLID
At Value - [F_PAR_gclid]
Press 'Save'.
6. Click on 'Change order' at the top and place the field in a desired position on the form. Then press 'Save'.

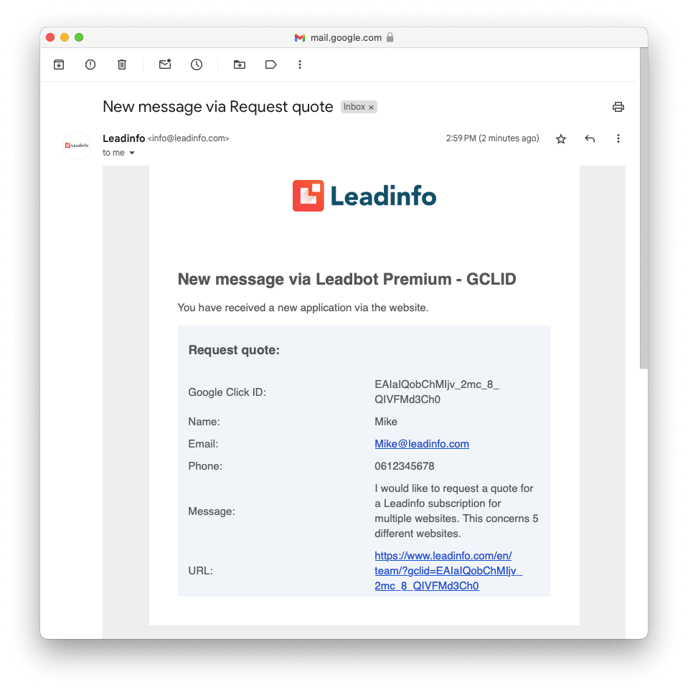
The GCLID is included 🎉
From now on, the GCLID will be sent with the Leadinfo Lead that you receive by email. You can also send it to other programs via the 'Zapier integration'.
This Google Click ID will also be sent when the website visitor goes to another page or returns to the website within 90 days and makes a request. This way you can properly measure the conversions!
.png?width=600&height=375&name=Leadbot%20-%20GCLID%20Leadbot%20Premium%20-%20stap%206%20(1).png)
When you use our 'Zapier integration' and connect it with Google Sheets, for example, the Google Click ID will be sent to the sheet. This way you can forward the leads with the Google Click ID to a desired system and track the conversions with this GLCID.

👉 Usecases Zapier Integration: Leadbot connection with Google Sheets