Depending on the number of website visitors your website generates, the inbox can become overwhelming. To give structure to your inbox for you and your colleagues, you can start using segments. Building segments helps to create clear overviews of different types of companies based on their characteristics or behaviour on your website.
In this article, we will show you everything you need to know regarding setting up segments.
Or check out the video below to learn more:
In this article, you'll learn more about:
- Why adding segments to your inbox is relevant
- How to create a segment
- The difference between triggers and segments
- Duplicating segments
Why is adding segments to your inbox relevant?
Before creating the filters of a segment, we'll focus on the benefits of segments. With segments you can:
📍 Create clear overviews for your sales colleagues
🏷️ Select companies, that have multiple tags
⌛ Filter based on behaviour on your website in a specific time period
How to create segments:
Step 1: Start building your segment. Click on "Advanced filters" or "Segments" to create a new segment in your inbox.

Step 2: Select the correct period for your segment. You can click on Custom to select a specific timeframe. Next, click on "+ Add filter" to add more data to your segments.
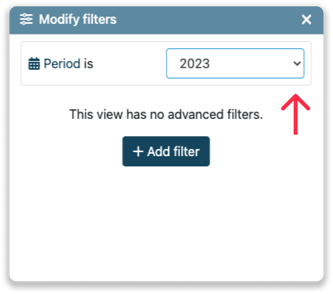
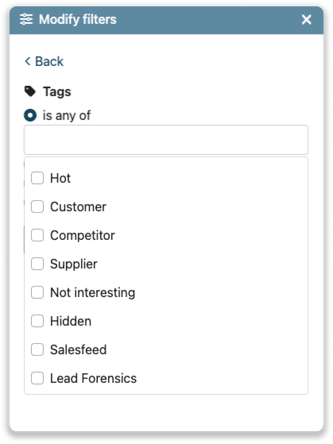
Step 3: Add your filters. You can add a filter based on company information, channels, or website activity. After you selected a filter, press "Apply filter".
For example, to filter on the companies that received the tag "Customer" select "Tag > is any of > Customer".
Step 3a: Two options appear. If you select "AND", a new rule is added to this segment. The company visiting the website has to meet both rules to enroll the segment.
For example, to identify companies that have the tag "Customer" AND visited the pricing page, click "AND" before adding the second filter or trigger.
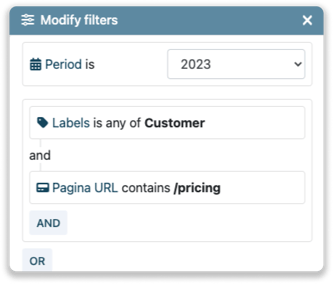
Step 3b: To identify companies that meet at least one criterion within a set of filters, use OR.
For example, to identify companies with the tag "Customer" or with the tag "Competitor", click OR before adding the second filter.

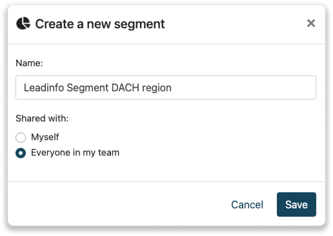
Step 4: Navigate to "Save as segment" on the bottom of the page to save this segment. Provide a name and select with whom you want to share this segment.
- Myself - this segment is visible only when you log in with your own Leadinfo credentials
- Everyone in my team - this segment is visible for all users in your account.
The segment is now visible on the left side of the inbox, underneath "Segments".
Segments vs triggers
At first glance, segments appear to be similar to triggers. However, there are some differences. This section explains the difference between segments and triggers and how they are used.
- Triggers enable you to perform actions, such as assigning a tag or sending companies to your CRM system. Segments are used to build your views in the inbox, but they do not perform any actions.
- Triggers work on the basis of real-time tracking. When you create a trigger, Leadinfo checks whether each website visitor meets the rules at the time of their visit. Segments, on the other hand, do not work on this principle, so you can define the time period of a segment yourself.
- Triggers are stored at the account level. When you save a trigger, it applies to all companies that visit your website. However, you can only save a segment for yourself, so your colleagues cannot see it.
Duplicating triggers
You can easily create a segment from your current trigger or report. With only a couple of clicks you get a clear overview of all the companies, that match the criteria from your trigger or report, within your inbox. Follow the steps below for each function.
Duplicating a trigger to a segment
Step 1: Create your trigger. A trigger consists of a set of conditions, that a company, that visits your website, needs to meet. Next, an action is assigned to the trigger, which is executed when the trigger is activated. This could be sending a lead over to your CRM, or assigning a tag to a company.
Do you want to know more about how to create a trigger? Head over to this article!
Step 2: After the trigger has been created, you can copy it as a segment. Hover over "Actions" and choose "Duplicate as segment".
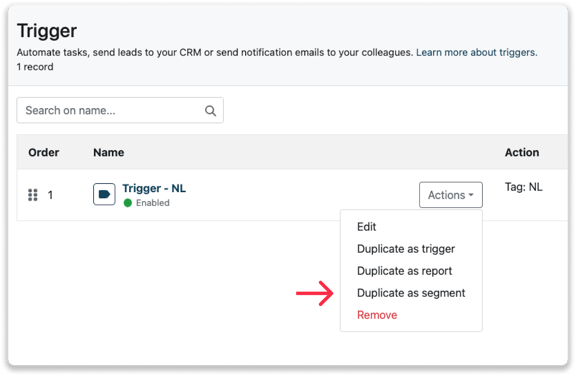
Your trigger has now been copied as a segment. You can go back to your inbox to filter on your segment.
Duplicating a report to a segment
Step 1: First, create your report. You can create a report by duplicating a trigger as a report, or create a report from scratch. Do you want to learn more about creating email reports? Head over to this article!
Step 2: After the report has been created, you can copy it as a segment. Hover over "Actions" and choose "Duplicate as segment".
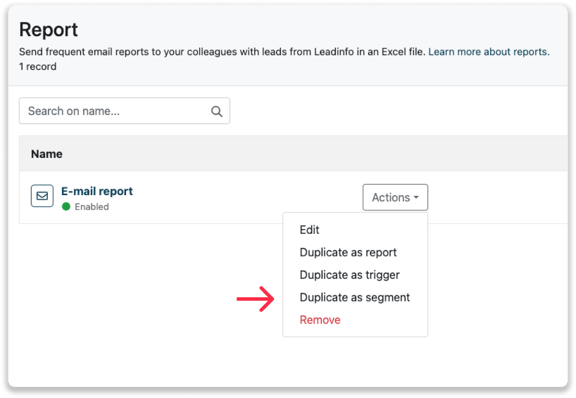
Your report has now been copied as a segment. You can go back to your inbox to filter on your segment.