Are your competitors constantly visiting your website? Or is your product or service only interesting for certain companies? You might want to hide certain companies that are not interesting to you.
In this article, we will explain how you can:
- hide companies that aren't interesting for every user in your account
- hide companies that aren't interesting for your own user account
Hide companies for every user in your account
By default, we've already created a few tags in your inbox. One of these tags is the tag "Hidden". When you assign this tag to a company, the company will be hidden for every user in your account.
There are different ways to assign tags to a company. Manually or automatically.
Manually via your inbox
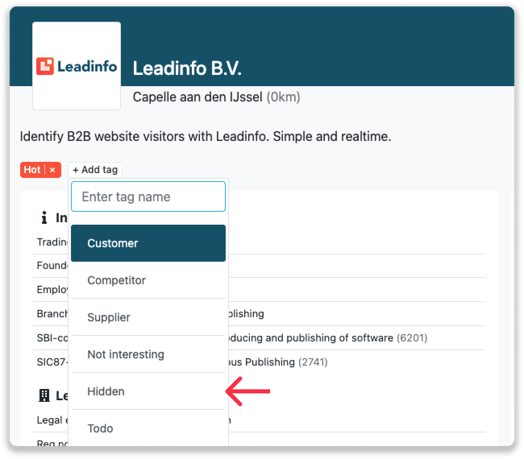
To manually assign a tag to a company, click in your inbox on the company that you would like to hide. In the company profile, you can click on "+Add tag" and search for the tag "Hidden". Once you have added the tag to the company, the company will be hidden from you and your colleagues.
Automatically via a trigger
If you want to hide multiple companies, it is easier to assign a tag via a trigger automatically. A trigger consists of a set of rules that your website visitor need to meet. If the visitor meets these rules, the action will be executed.
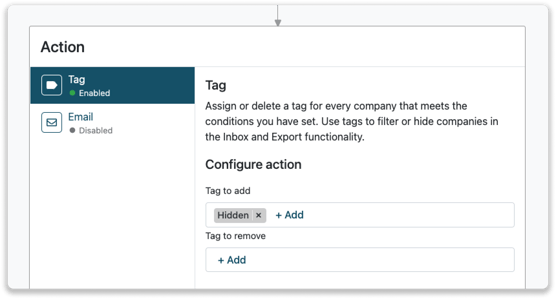
Go to "Trigger" and determine the rules which the website visitors need to meet. Select "Assign tag" under "Action" and select the correct tag from the dropdown menu. You can find more information on how to set up triggers here.
Only hide companies in your user account
To create an inbox with only companies that you want to follow up on, you can hide companies only for your own inbox. By doing so, your colleagues will still see all the companies in their inbox, while you can focus on the companies you really want to follow up on.
Follow the steps below to hide companies in your inbox.
Step 1: Create the tag "Not interesting"
By default, we have already added tags to your inbox. One of these tags is "Not Interesting". You can create new tags if you want by clicking on "+add tag" on the left side of the menu.
Step 2: Hide the Tag in your inbox
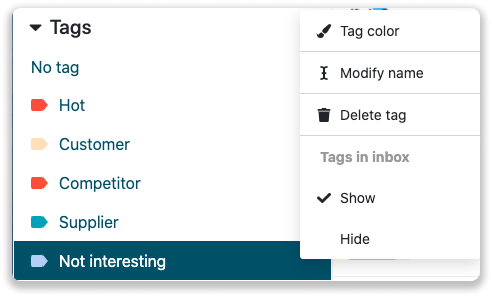
Once you have created the tag, you can directly find it in the left menu. To hide the tag in your inbox, you need to hover your mouse over the tag and click on the 3 dots. Here you can select "Hide" under "Tags in inbox".
Step 3: Connect the tag to a company
The only step left is to connect the company you want to hide with the tag "Not Interesting". You can do this in two ways:
Manually via your inbox
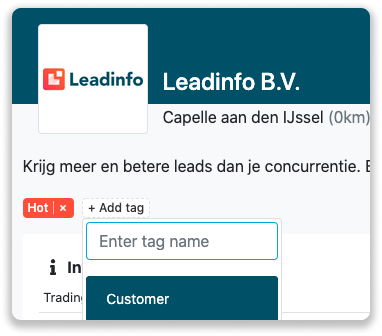
In your inbox, click on the company that you would like to hide. In the company profile, you can click on "+Add tag" and search for the tag "Not Interesting". Once you have added the tag to the company, the company will be hidden in your inbox.
Automatically via a trigger
If you want to hide multiple companies, it is easier to assign a tag via a trigger automatically. A trigger consists of a set of rules that your website visitor need to meet. If the visitor meets these rules, the action will be executed.
Go to "Trigger" and determine the rules which the website visitors need to meet. Select "Assign tag" under "Action" and select the tag ''Not interesting'' or ''Hidden''.
You can find more information on how to set up triggers here.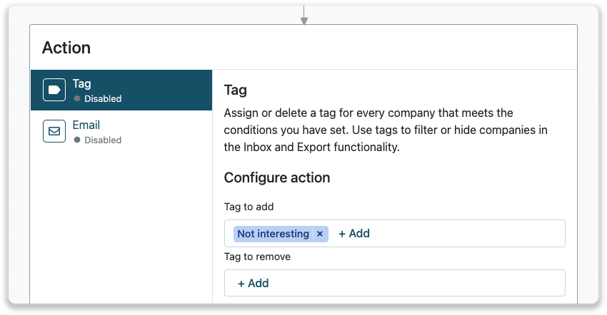
Good to know: It’s only possible to hide companies from your inbox by using tags. It’s not possible to completely exclude a company from the system or from your website traffic, they will always be counted as part of your total traffic. However, Leadinfo always includes a 5% fair use margin in each package to cover visits that might be irrelevant, so you’re never charged for those.