BigCommerce allows you to install custom tracking codes on your website. Simply follow the below steps to install Leadinfo and start recognising the companies that visit your website.
Leadinfo Tip 💡 Have you already installed a Google Tag Manager plugin? Then it is best to read this article on how to install our tracking code via Google Tag Manager.
Step 1: Head to the Settings page in the Leadinfo portal, choose the domain you want to install the tracker on, then select 'BigCommerce'.
![]()
Step 2: Copy the code in the Tracker installation page
![]()
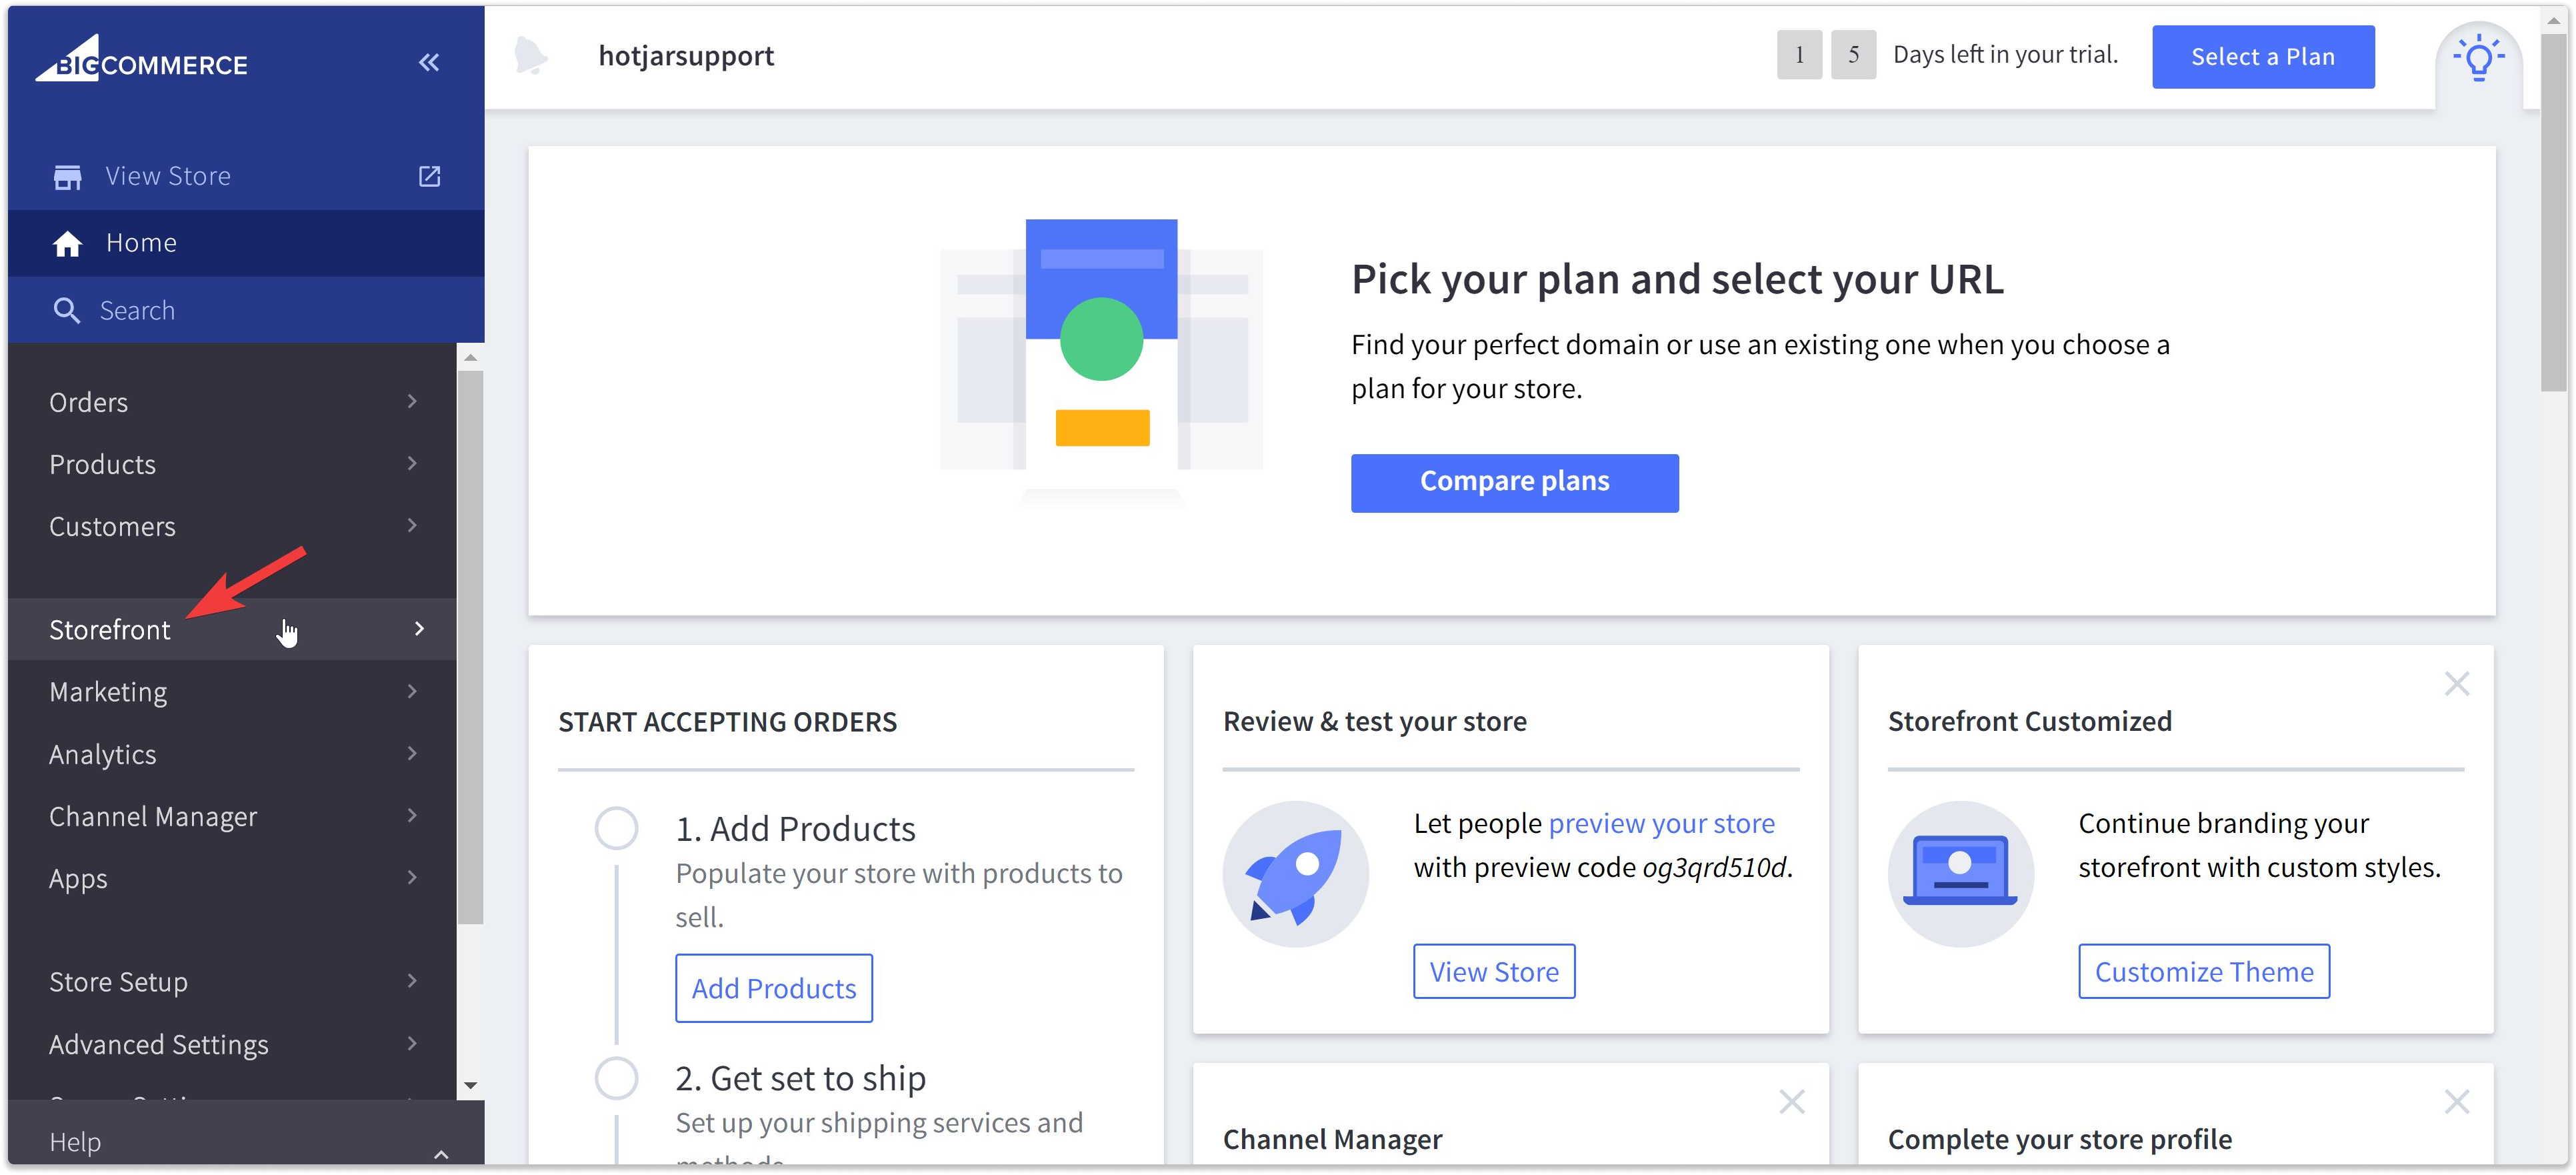
Step 3: Within your BigCommerce dashboard, navigate to "Storefront" and select "Script Manager"
Step 4: Within Script Manager create a new script by clicking "Create a script". Here you need to insert the Leadinfo tracking code that you copied in step 2 and provide all the extra info.
Name of Script: Can be any name you like to create a clear overview of the different scripts.
Description: Give a clear description of the tracker of leave it empty.
Location page: Here you need to select "Head".
Select pages where script will be added: Determine whether you want to track all pages or just specific pages of your website. We recommend tracking all pages to gain insights of your entire website.
Script Type: Here you need to select "Script".
Script contents: Here you need to paste the copied tracking code from step 1.
Step 5: Click "Save", and your tracking code will be active on your website
The tracking code will be activated immediately, so you can start identifying companies that have visited your website. You'll find an overview of the companies in your Leadinfo inbox.
New to Leadinfo? You'll gain access to the rest of the portal as soon as we register the first business visit to your website.