Easily manage your colleagues as users in your Leadinfo account! This article will cover the following topics:
Please note: The number of Leadinfo users depends on your subscription package (Starter: 3, Scale: 10, Pro: unlimited). If you need more users than your current package allows, upgrade your account in the Leadinfo portal.
Adding users
Step 1: Go to ''Settings'' in the Portal.

Step 2: Select ''Users'' left in the menu.

Step 3: You can add new users via ''+ Invite a user''.

Step 4: Fill in the open fields and select the language of the Portal for the user.

The new user will receive an e-mail in which they can activate their account.
Removing users
Step 1: Go to ''Settings'' in the Portal.
Step 2: Select ''Users'' in the menu on the left.
Step 3: You can delete a user by selecting the relevant user and clicking on the button ''actions''. Then you can click on ''revoke access''.
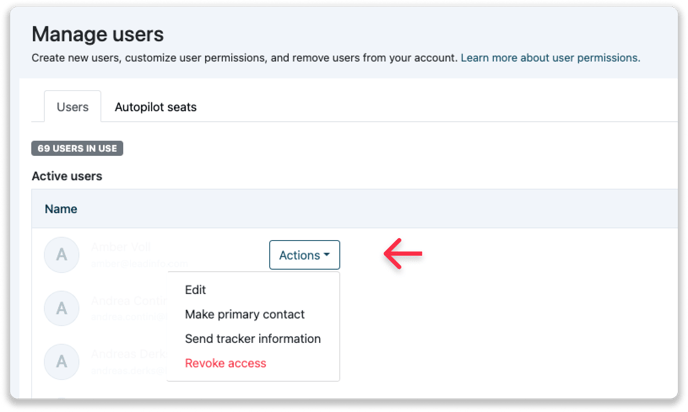
You can also cancel an invitation or resend the activation email by clicking on the inactive user and choosing the ''Resend'' or ''Cancel invitation'' options.

Managing user roles
You can easily assign and change user roles from within the Users section of your Leadinfo account.
Step 1: Go to "Settings" and select "Users" from the menu on the left.
Step 2: Hover over the user you wish to manage and click on "Edit."
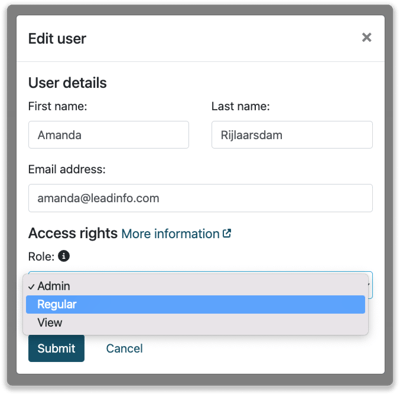
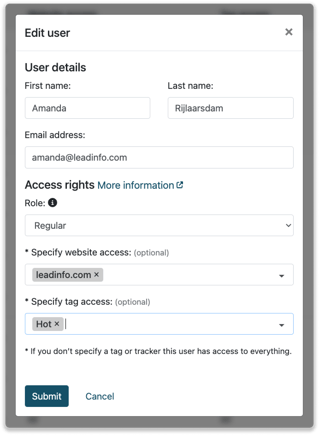
Step 3: Under "Access Rights," choose the appropriate role for the user. If you select the roles of Regular or View, you can further manage their access rights. Specify whether your colleagues will have full rights to all companies in your inbox or to every tracking code in your account.
Step 4: To limit access, select the appropriate domain under "Specify tracker access," and choose the relevant tags under "Specify tag access" to determine which companies will appear in the user's inbox.
Looking for more information about user roles? Click here for more information.