You want to be notified when interesting leads visit your website. Preferably all in one e-mail so you or your sales team can give them a call. This is possible with our Report functionality. Set up your daily, weekly, or monthly email reports within a few clicks!
Please note: The number of reports available depends on your subscription package (Starter: 3, Scale: 10, Pro: unlimited). If you need more reports than your current package allows, upgrade your account in the Leadinfo portal.
In this article, we'll discuss:
How to set up your report
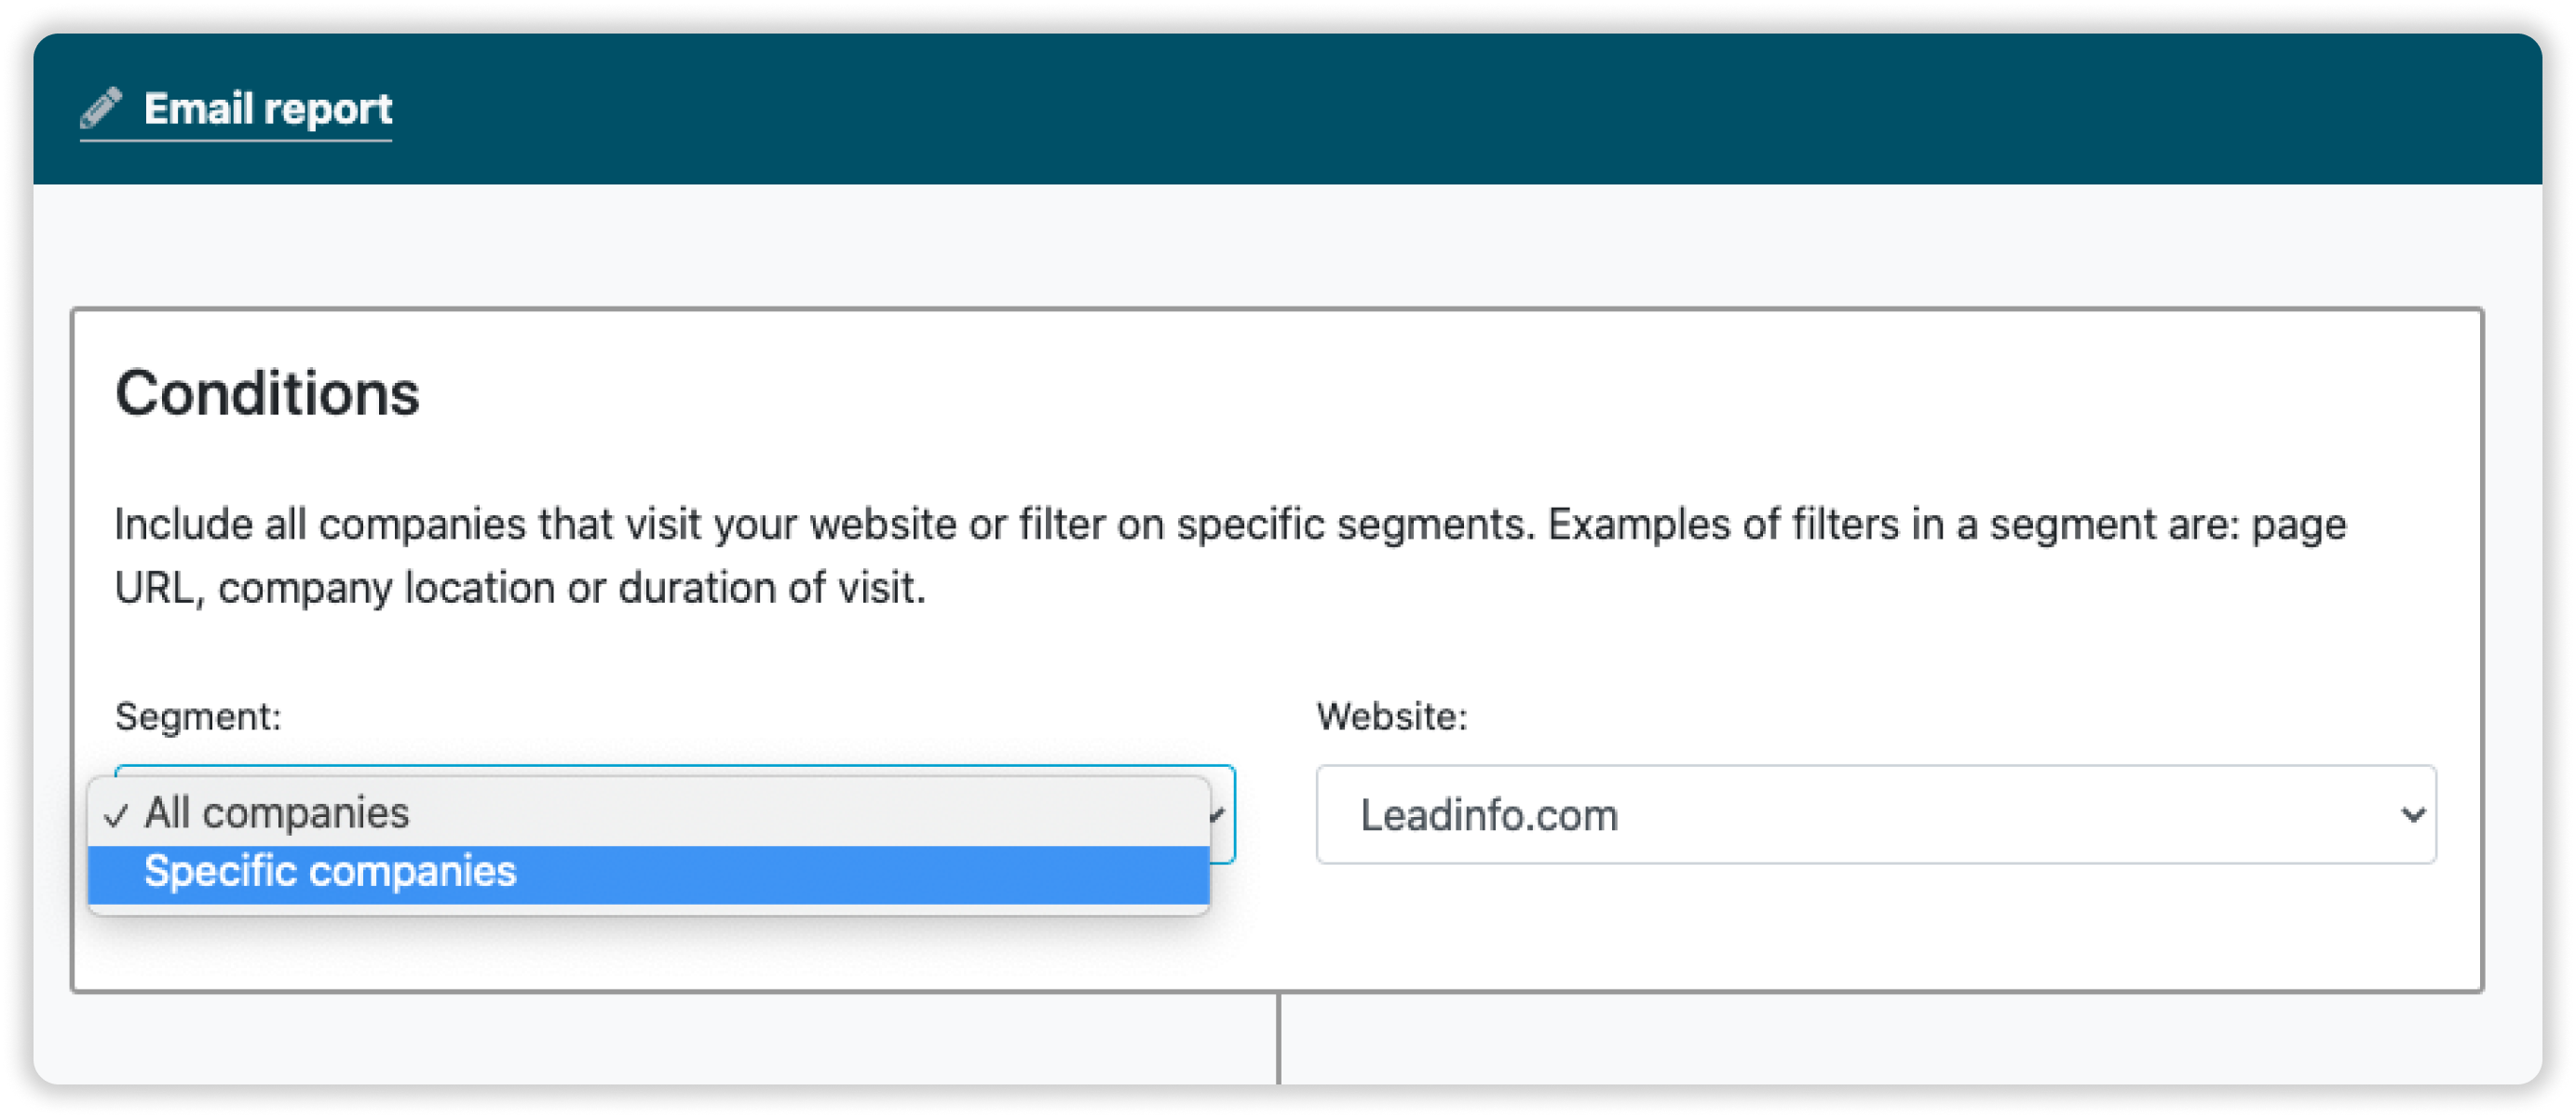
Step 1: Define your segment
To set up your report, you first need to decide what segment you want to receive an email report from. You can choose from two different segments:
- All companies
- Specific companies based on rules
If you select specific companies, you'll need to set up the rules a website visitor needs to meet in order to be added to the report. It is also possible to select an already existing segment.
More information about segments can be found here.
Step 2: Set up the rules for specific companies.
When you decide to receive an e-mail report from specific companies, you need to think about what rules should the company meet in order to be included in your report. These rules are based on the characteristics of a company or based on the behavior a company showed.
For example, your colleague is responsible for the DACH Region and a lead is only interesting if they have more than 5 employees, have visited more than two pages and does not have the tag Customer. Your rules need to be set as in the below screenshot.
Now all the companies who meet the rules in the trigger will be included in the e-mail report.
➡️ Check out this help article to discover more on how to set up these rules.
-png.png)
Step 3: Set up your email
Now you can start setting up the email. Fill out the needed information on who needs to receive it and the title and message in the e-mail.
- Recipients: Who should receive the e-mail. You can also add people who do not have a Leadinfo account.
- Subject: What subject title should the email have. Make sure it's clear and stands out from the rest of the e-mails.
- Message: Include a short message to inform the person why they received this e-mail.
- Language: You can send the e-mail in 8 different languages!
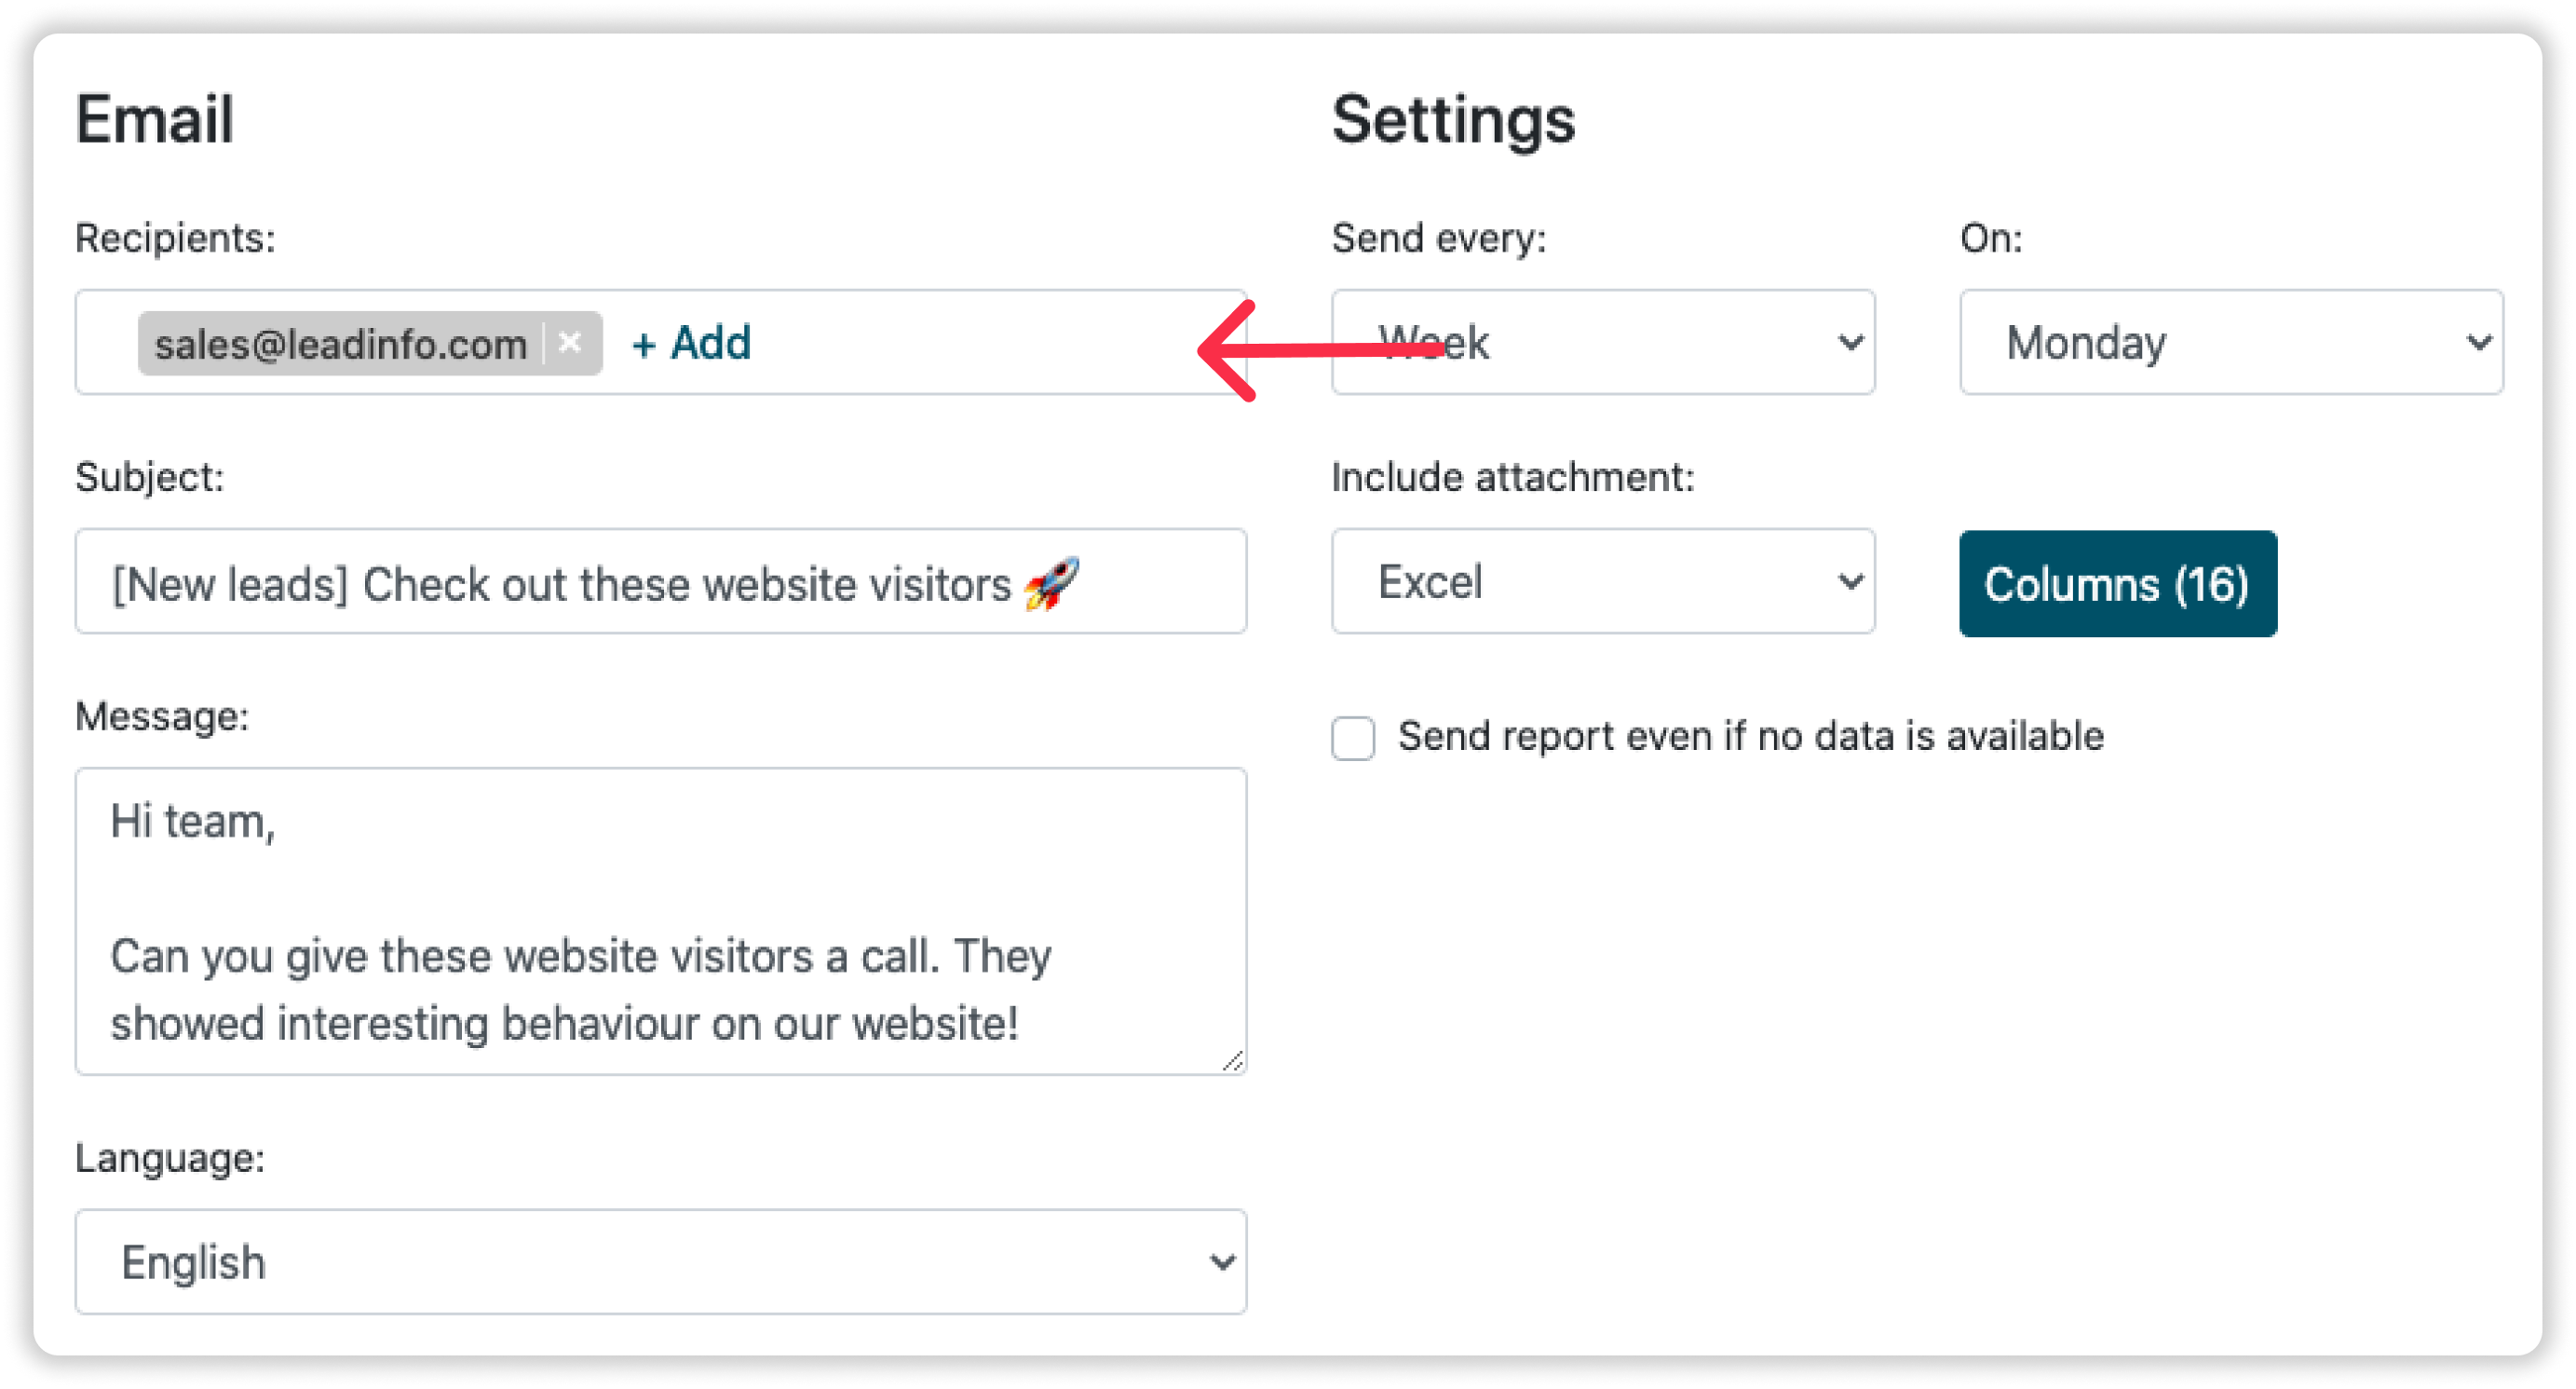
Step 4: Decide when you want to send the email.
Decide how often you want to receive an e-mail report. You can send the report Daily, Weekly, Bi-Weekly or Monthly. In your report, you will find all the companies who met the rules you've set up in the given period.
For example, if you want to receive a weekly report on Monday, you will receive a report of all the companies who met the rules on Sunday until Sunday.
Step 5: Include an attachment.
The final step to get started with e-mail reports! Select whether you want to include an attachment with more information on the company or not! You can add an Excel file or a CSV file as an attachment. In this file you'll find a list of all the companies with company information.
To change the company information in the file or add more information to the file, simply click on the Columns button. Here you can select the properties you want to include in your Excel file!
-png.png)
Below is an overview of the information you can include in the report.
| Company ID | Name | Description |
| CoC number | Branch code | Branch |
| Employees | Address | Postal code |
| City | Country | Website |
| Email address | Phone number | Visiting time |
| Company URL | Page title | Duration |
| Referrer | Term | Campaign |
| Ad group | Search term | Tags |
| Comments | Session ID | Trading Name |
| Founded | VAT | Sales Volume |
| Vimeo | ||
| Dribbble | ||
| Github | ||
| Youtube | Legal entity | |
| Province | Branch code national | Branch name national |
| Branch code international | Branch name international | Latitude |
| Longitude | Domain | Inbox URL |
| First Visit | Last Visit | Distance |
| Branch name |
The pages that have been visited are also automatically added to the report. This means you don’t have to manually track which pages were viewed by the companies, this process is fully automated. You can find these page views in the second tab of the provided file.
In this tab, you'll find an overview of the specific pages viewed by the visitors, including the number of views and the time they spent on each page. This provides valuable insights into your website visitors’ behavior and helps you understand which content is most engaging for your leads.
Step 6: Send a report even if no data is available.
If you have set specific criteria, there may be weeks when there are no leads to send. To ensure the report is functioning correctly and is received, you can select the option "Send report even if no data is available." This way, you'll receive an empty report, letting you and your colleagues know that everything is working properly.
And just like that, you've set up your email reports in 6 steps!
How to copy a report
After you have made your first report, you can easily create new ones. The copy button in the overview creates new reports in just one click. Change the rules or text to meet your requirements, and you have the second report up-and-running.
Duplicate as a report
Step 1: Navigate to the report which you'd like to duplicate and select "Actions".
Step 2: Press "Duplicate as report".

Step 3: A new report is added. This can be found at the top of the overview.

Duplicate as a trigger
Step 1: Navigate to the report which you'd like to duplicate and select "Actions".
Step 2: Press "Duplicate as trigger".

Step 3: A new trigger is added. You are automatically redirected to the overview of your triggers.

If you need any help with setting it up, contact us via support@leadinfo.com!