Installing our trackingcode through Google Tag Manager is one of the most common ways to install Leadinfo. However, if you're not that familiar with Google Tag Manager, it is easy to overlook some settings.
Make sure to follow the steps in this article. Afterwards you can follow the steps below to troubleshoot the installation through Google Tag Manager.
1. Look for unpublished changes
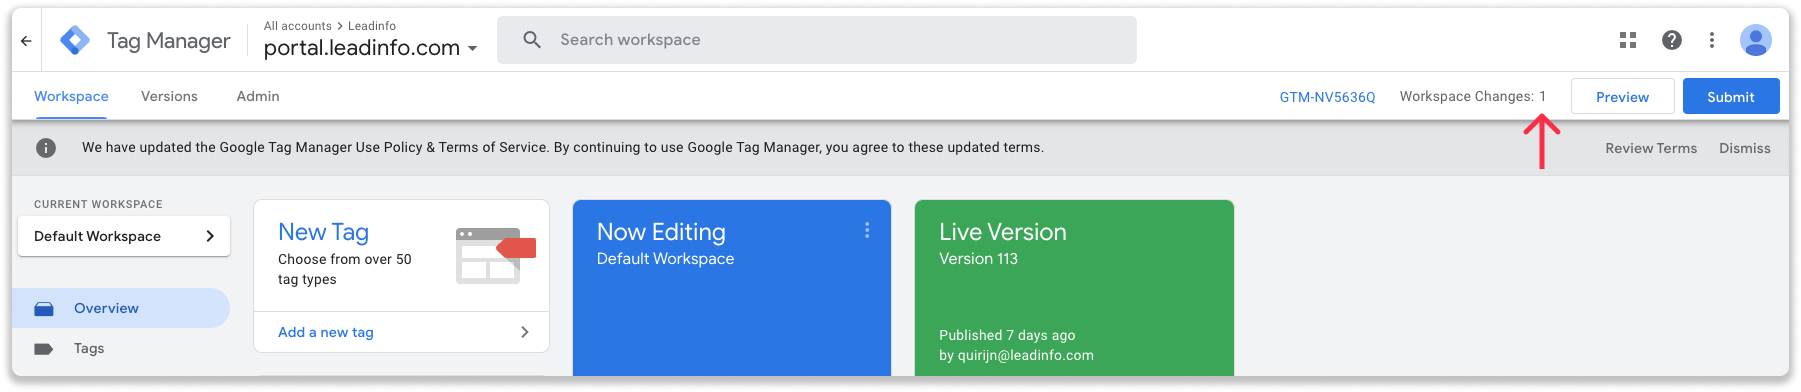
Foremost, you'll need to check if the latest version of Google Tag Manager is published.
Step 1: Go to your Google Tag Manager Container and check if there are still unpublished changes.
Step 2: Take a look in the top right corner, next to "Submit". Here you'll see if there are still unpublished Workspace changes.
- If you see Workspace changes as in the picture below, you'll need to publish the changes. To do so, click "Submit" and publish the changes you've made.
- If you published all the changes, continue to point 2.
2. Check if you're working in the right container
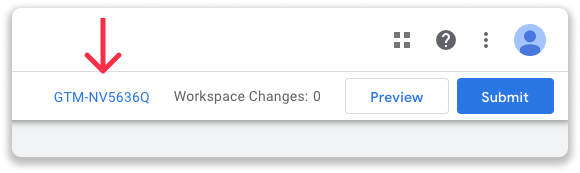
If the changes are live and Leadinfo still hasn't registered traffic, you need to check whether you're working in the correct container. Within Tag Manager check what unique container ID your container has.
Step 1: Go to your container in Tag Manager and look for your container ID. You can find this container ID in the top right corner of your workspace.
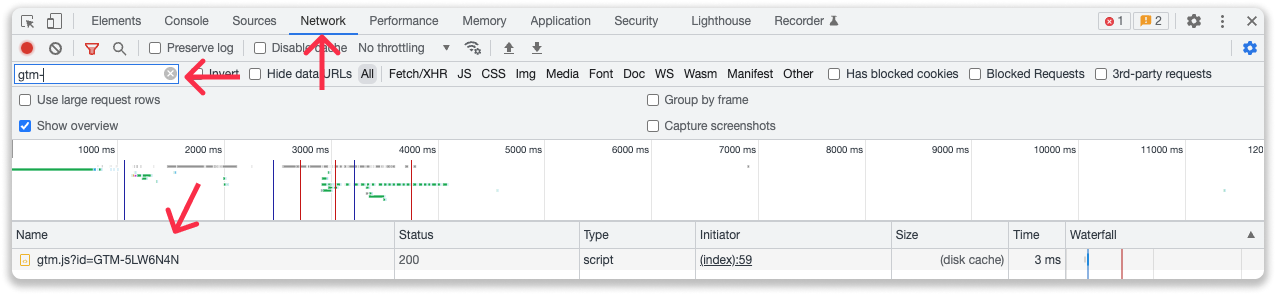
Step 2: In Chrome go to the website you want to track and right-click on the website. From the menu select "Inspect".

Step 3: In the Developers Console click on "Network" in the op menu and search for "GTM-". In the list you will find the container ID's that are live on your website.
- If the container ID on your website is different from the container ID in Tag Manager, contact your site administrator to gain access to the correct container.
- If the container ID on your website matched the container ID in Tag Manager, continue with point 3
3. Confirm if Google Tag Manager fires the Leadinfo tag
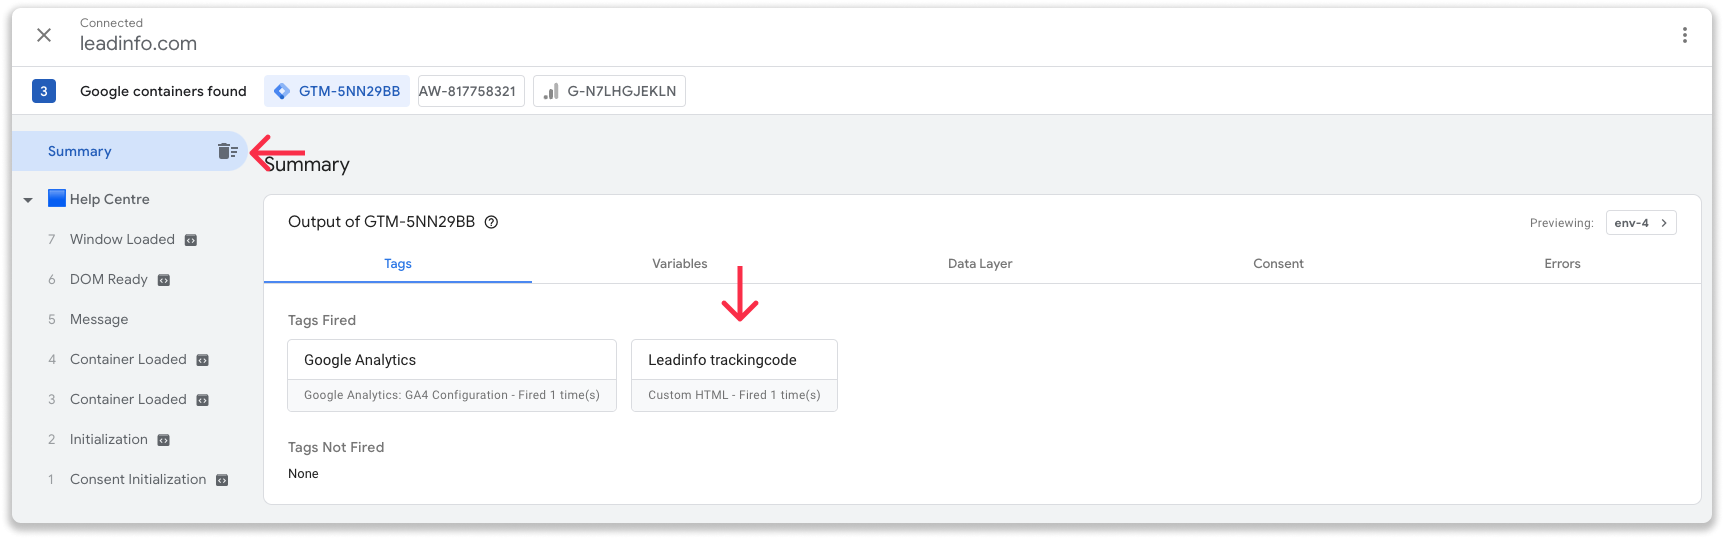
Within Tag Manager check if the Leadinfo Tag you've created fires. This is done through the preview mode of Tag Manager.
Step 1: Within Tag Manager, click on "Preview" in the top right corner. Tag Manager opens a new tab call the tag assistant.

Step 2: After you provide your website's URL, Tag Manager will open your website in a new window.
Step 3: Navigate back to your tag assistant. You can check has fired in your summary below "Tags Fired".
- If you tag has fired, you need to check if you've copied the code correctly from the portal and/or if you have not made any accidental changes to the script.
- If your tag hasn't fired you need to check the trigger(s) you connected to the tag. Follow point 4 for more information.
4. Check if you connected the right trigger to the Leadinfo tag
If your Leadinfo tag doesn't fire in the preview mode, chances are that the trigger is installed incorrectly. These are the most common issue when assigning a trigger to a tag
All pages trigger
Firstly, if you want Leadinfo to be active on every page of your website, check if you have connected the "All Pages Trigger". This trigger is a default trigger created by Google.
Create separate triggers for specific pages
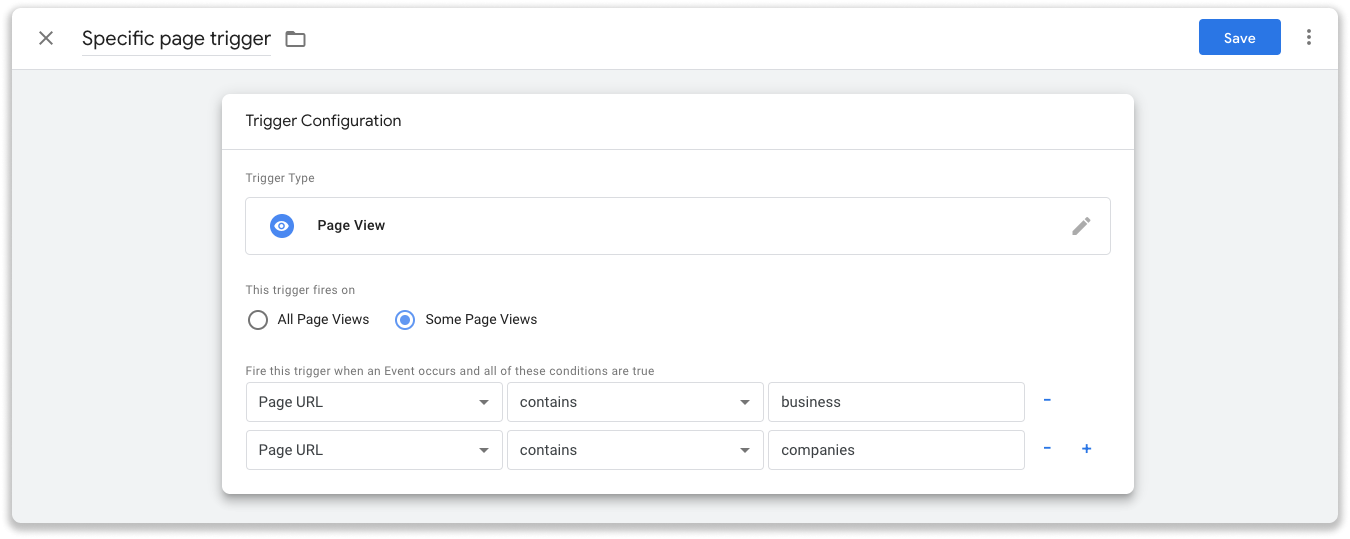
When you want to activate the Leadinfo tracker on specific pages of your website, you'll need to create a separate trigger for each page you'd like to track. Below you can find an example of a trigger installed incorrectly, and a trigger installed correctly. In the example, we want to track the pages containing “Business” and “Companies”.
Incorrect
Below we've added the condition in one trigger. However, Google will now look at the pages that meet both conditions. Meaning that the tag will only fire when someone visits a page that contains both "Business" and "Companies"
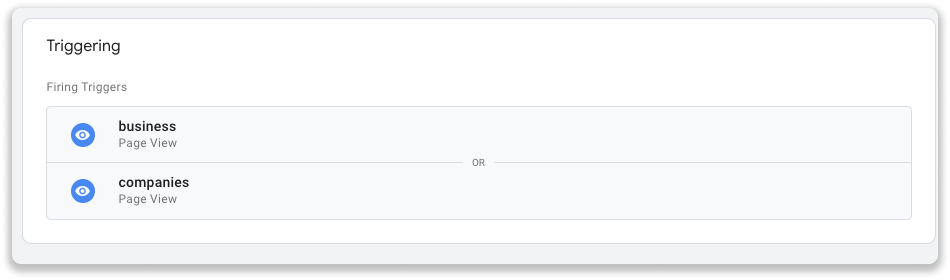
Correct
Below we've created two different triggers and added both triggers to the tag. The tag will now fire when someone visits the business page or the company pages.
Look over the conditions in your trigger
Also check the conditions you used up in your trigger. Common mistakes are using the condition "equals" when you want to use "contains".
We highly recommend using the conditions "Page path" and "Page URL" in combination with "Contains".
5. Empty your website cache
Your website can still show cached content, which doesn't show the changes you made. Normally, your cache will be cleared after you make changes. It can, however, happen, that the cache doesn't realise that the changes have been made. Resulting in loading the old version of your website.