Easily create your campaign within Leadinfo Autopilot. Sit back and relax whilst replies enter your email inbox or linkedin messages! Here's how it works:
- Connect your LinkedIn and/or Email
- Build your campaign
- Set up your E-mail Steps
- Set up your LinkedIn Steps
- Add a delay in between the steps
- Determine how leads will enter the campaign
- Configure campaign settings
Connect your LinkedIn and/or Email to Leadinfo
Head to your settings within Leadinfo and select "Autopilot" on the left side

To add a new e-mail address, select “New provider” next to "Connected Email providers".
Select your e-mail provider and provide your e-mail credentials.

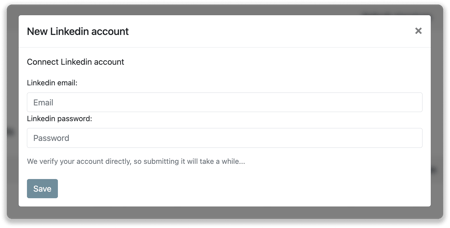
To add your LinkedIn Account, Select "Add new Account" next to "Connected LinkedIn Accounts".
Provide your LinkedIn Credentials. If you have set up Two-Factor Authentication within LinkedIn, you need to provide a security code.
Build your campaign
Once you have connected your account, you can start building your campaign. Head to "Autopilot" in the Leadinfo portal to get started.
To create a new campaign, select “New Campaign” and begin by selecting the first step for your campaign. Once you have made your first selection, you can continue adding more steps to your campaign.
You can choose from the following steps:
- Email: Send an automated email
- LinkedIn message: Send someone a LinkedIn message (if connected)
- Visit LinkedIn profile: Show up in the "Who's viewed your profile" list. Make sure to update your visibility settings within LinkedIn.
- LinkedIn Connection Request: Send someone a connection request on LinkedIn
- Tag Lead/Company: Automatically assign a tag to a lead or company
Please note: To prevent too many messages send from your email and linkedin account, we will only send 250 e-mails, 50 profile visits, 20 follow requests, 20 connection requests, 50 personal messages per 24 hours. Learn more about sending limits in this article.
E-mail steps
To create an e-mail select "E-mail". A module will appear on the right hand side. Your connected e-mail account is automatically selected as the sending account. If you wish to create a campaign for your colleague, select their e-mail or invite them to connect their e-mail address. Want to know more about creating a campaign for your colleagues? Select "Invite a colleague" to email your colleague for their account connection.
Draft your e-mail by giving it a title and adjusting the body of the text. 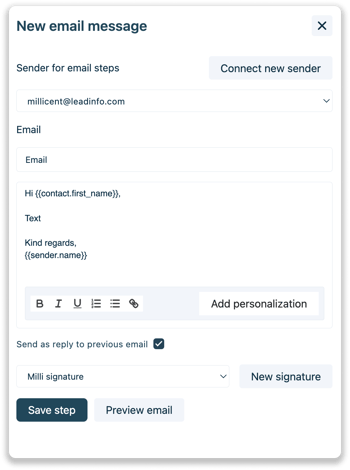
Leadinfo Tip 💡: If your campaign exists out of multiple e-mails, make sure to select "Send as reply to previous email". By doing so the e-mails will appear as a thread in the e-mail inbox of the lead.
You can even personalise the text by inserting Personalisation Tokens, allowing you to send automated e-mails using the contact's first name or company name.
Personlisation Tokens you can use:
- First name
- Last name
- Icebreaker 1
- Icebreaker 2
- Job title
- Job department
- Company name
- Company website
- Sender mail
- Sender name
Once you have created your e-mail you can preview and test the e-mail by clicking on “Preview”.
Select a Lead to see the e-mail with filled custom variables.
Send a test email to yourself or a colleague.
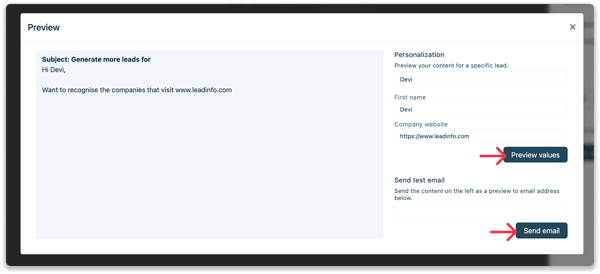
Please note: If you use personalisation tokens and do not select a lead to preview the text, the personlisation tokens will be empty in your test e-mail.
LinkedIn Steps
There are 3 LinkedIn steps your can choose from:
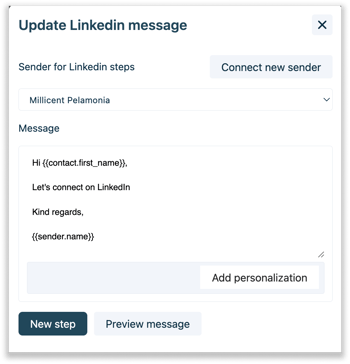
- LinkedIn message: Send someone a LinkedIn message (if connected)
- Visit LinkedIn profile: Show up in the "Who's viewed your profile" list. Make sure to update your visibility settings within LinkedIn.
- LinkedIn Connection Request: Send someone a connection request on LinkedIn
Setting up these steps are pretty straight forward. For the steps "Connection Request" and "Message", you can even add personalisation tokens to personalise the messaging.
Personlisation Tokens you can use:
- First name
- Last name
- Icebreaker 1
- Icebreaker 2
- Job title
- Job department
- Company name
- Company website
- Sender mail
- Sender name
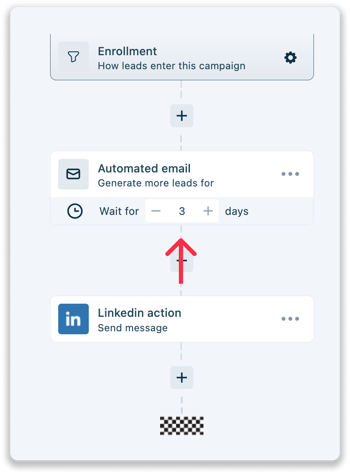
Add a delay between the steps
To ensure a smooth flow in your campaign with multiple steps, it is recommended to include a delay between each step. Adding a delay allows you to control the timing of each action. For instance, you may want to send an email first and then follow up with a connection request after a delay of 3 days. By incorporating delays, you can maintain a well-timed and effective follow-up sequence.
One day is equal to 24 hours.
Leadinfo Tip 💡 For a more personalized approach, we suggest stopping the campaign for leads once they respond to an email. You can easily configure this in your campaign setting. Learn more about the campaign settings in this article.
Determine how leads will enter the campaign
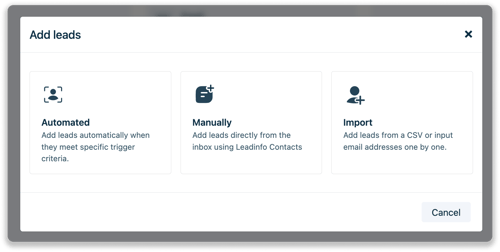
Once you publish your campaign you have the option to import leads immediately or add them later. If you wish to add leads immediately you can add them in 3 ways:
- Automatically push leads into your campaign using triggers
- Manually add leads from the Leadinfo inbox using Leadinfo Contacts
- Import Leads from a CSV upload or by copy pasting email addresses
Automatically add your leads using Triggers
Truly want to put your sales follow-up on autopilot? Start pushing your leads automatically into your campaign. When pushing you campaign live for the first time you can select "Automatically" to push leads into your campaigns using triggers. Decide if you wish to:
- Use an existing trigger or
- Create a new trigger
We highly recommned using an existing trigger if you already create the perfect trigger that tags your hot leads or pushes your sales qualifid leads to your CRM.
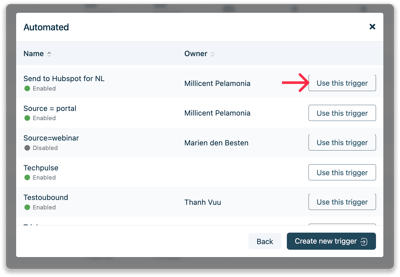
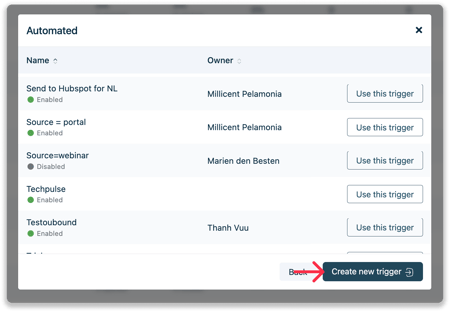
Use an existing trigger
Simply select the trigger you wish to use from the overview.
After selecting the trigger, you need to determine what contact from the company to push into your campaign. Select the department your contact needs to be decision maker of. If there are multiple decision makers of the same deparment, we will push the contact that works the longest at the comapny. Ensuring your will always reach out to right contact person,
Select Start Automation and the action "add to campaign" is automatically added to your existing trigger .
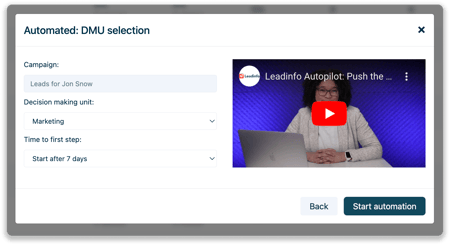
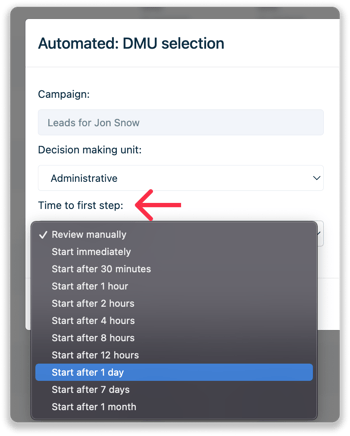
Lastly, you can choose the delay before the first step is exectued. Select the waiting time. We highly recommend to add a delay of at least a few hours or days.
If you wish to review your leads manually before adding it to the campaign select "Review Manually". You will then find the leads in the overview "Leads to Review". More information about how can review your leads can be found in this article.
Create a new trigger
To create a new trigger select "Create new Trigger".
Here you can select the rules a company needs to meet in order to be pushed into your campaign. Think about he company charactersitics of your ideal customer or the behaviour a hot lead neeeds to show on your webiste.
For example, you focus on comapny from the United Kingdo, who visited the website at least once and visited the pricing page.
The rules in your trigger will then look like the following:
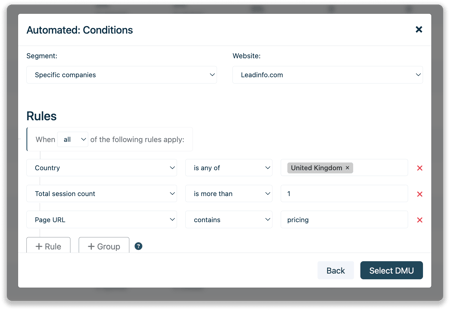
After creating the trigger, you need to determine what contact from the company to push into your campaign. Select the department your contact needs to be decision maker of. If there are multiple decision makers of the same deparmtent, we will push the contact that works the longest at the comapny. Ensuring your will always reach out to right contact person,
Please note 📝 Only one contact from each company will be pushed to Leadinfo Autopilot. This lead is always the decision maker of the selected department. In cases where there are multiple decision makers, we will push the contact who has been working at the company for the longest period of time.
Lastly, you can choose the delay before the first step is exectued. Select the waiting time. We highly recommend to add a delay of at least a few hours or days.
If you wish to review your leads manually before adding it to the campaign select "Review Manually". You will then find the leads in the overview "Leads to Review". More information about how can review your leads can be found in this article.
Manually add leads from the Leadinfo inbox
Manually add leads to your campaign from the company profile in the Leadinfo inbox! Head to the company profile of the leads and scroll down to the Contacts.
In the contact overview select the sending button to add the contact to an Autopilot campaign. When the sending button is Pink the lead is not added to Leadinfo Autopilot. When the sending button is Blue the lead is already in Leadinfo Autopilot!
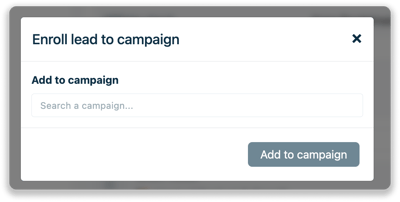
To add the lead click on the sending button.

And search for the the campaign to wich the contact needs to be added.
Import your leads in three different ways
You can also decide to bulk import your leads in three different ways:
- Upload leads using a CSV file
- Copy paste e-mail addresses
- Select Leads that already within Autopilot
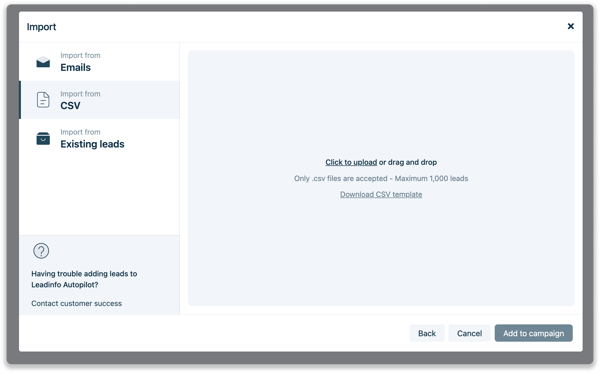
Import leads from a CSV file
Import your leads using a CSV file. By importing the leads using the CSV file you can add more information such as company name, LinkedIn account, phone number and other info!
Download the .csv template from the portal to get started!
Provide all the info needed in the template. Then, upload the file and click on "Add Leads".
Keep the following in mind when uploading your .csv file:
- The e-mail address is a required field
- All headers in the CSV template must be included. Even if you leave the columns empty.
- Headers should stay in the CSV template’s original order
- There's a maximum of 1000 contacts
- Only .csv files are accepted
Import leads by copying and pasting e-mail addresses
Simply copy and paste a list of e-mails in this pop-up.
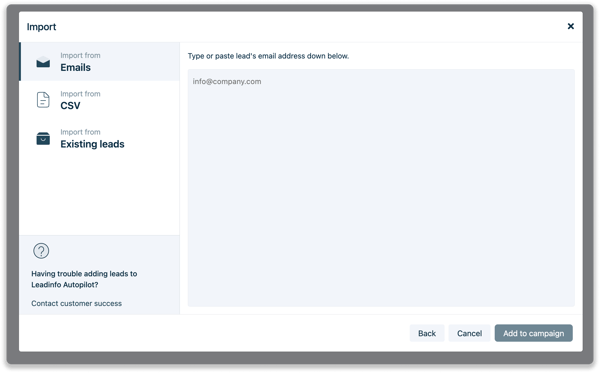
Please note 📝 When you add leads by copying and pasting the information you cannot add personalisation to the content, unless you update the contact afterwards.
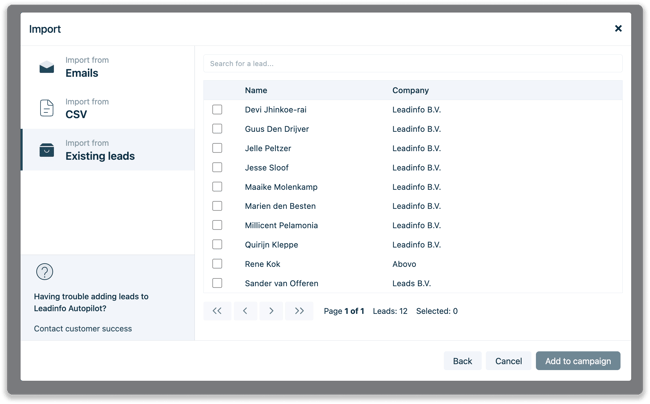
Add leads from existing leads in Autopilot
To add leads who are already in Leadinfo Autopilot, you can easily search for a lead and select the ones you want to include. Simply perform a search for the desired lead and choose the leads you wish to add to proceed.
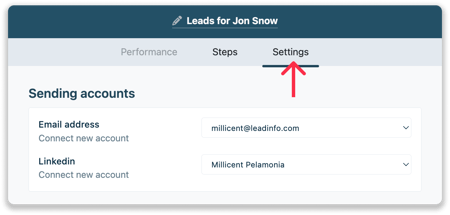
Configure your campaign settings
After you're done with creating the campaign and adding leads, you can always make adjustments to your campaign settings. Head to your campaign and select "Settings".
Here you can change sending accounts.
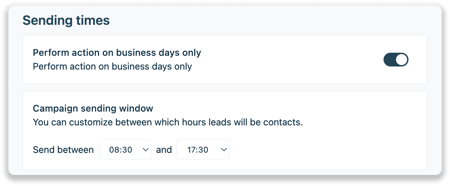
Decide if you wish to perform actions on business days only and/or adjust your sending times.
Below advanced settings determine the time zones and sending days.
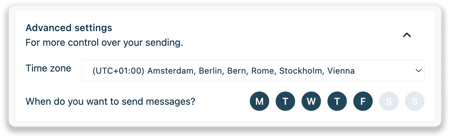
Please note: The timezone is determined based on your device. Leadinfo does not take the timezone of the receiver into account.
And adjust your tracking configuration!
- Track sent emails - If activated, all emails send to contacts in Autopilot are tracked. Therefore, once a contact opens or clicks on links in an email, this will be shown in the Activity page within Autopilot as a status update. In addition, the tracking details are also shown in the inbox under "page views".
![]()
- Convert and track links in emails - When you active Convert and Track Links in E-mails, Leadinfo will connect the person to the visit. We will then show exactly who visited the website

- Allow the contact to unsubscribe - If this setting is turned off Leadinfo will not add an unsubcribe link to the e-mai.